目标
在这篇文章中,我们将学习如何使用GitHub Actions做一个简单的自动部署。部署 “可能有不同的含义,取决于上下文。在这个特定的环境中,我们谈论的是将推送到GitHub的代码自动上传到服务器(如AWS EC2)。这在我们需要采取重复性行动将代码设置到生产环境中很有帮助。
就我而言,它在更新我的博客时提高了很多效率。我发现一旦我向博客上传新的东西,有挺多步骤是一直重复的。
1 | - 写好文章。 |
设置完GitHub Actions后,我把它自动化成:
1 | - 有写好的帖子。 |
准备工作
以下是这次部署的关键作用。
Github repo
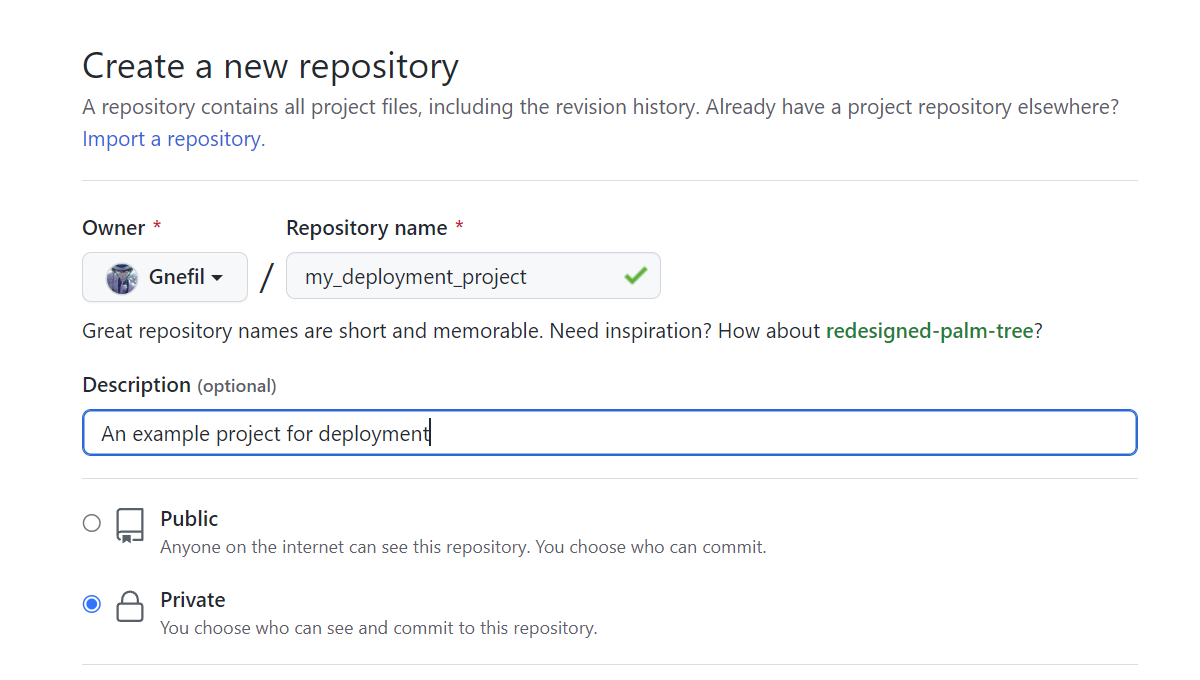
首先,我们假设我们有一个GitHub账户。我们将启动一个新的 repo 作为例子,并将其称为 “my_deployment_project”,并将其克隆到你的电脑中的某个地方。
1 | Computer |
服务器
一个像AWS EC2这样的托管服务器,有一个准备发布到公共互联网的文件夹。这可以通过Apache、Nginx或其他网络服务工具实现。你也应该有你的SSH密钥来访问服务器。
为了介绍这个部署的例子,我在服务器的home目录下创建了一个deployed_folder。
1 | Server |
当然,现在它是空的。
Automate deployment
Set up GitHub Actions
If we look right now at our Actions tab in the repo, we find it empty.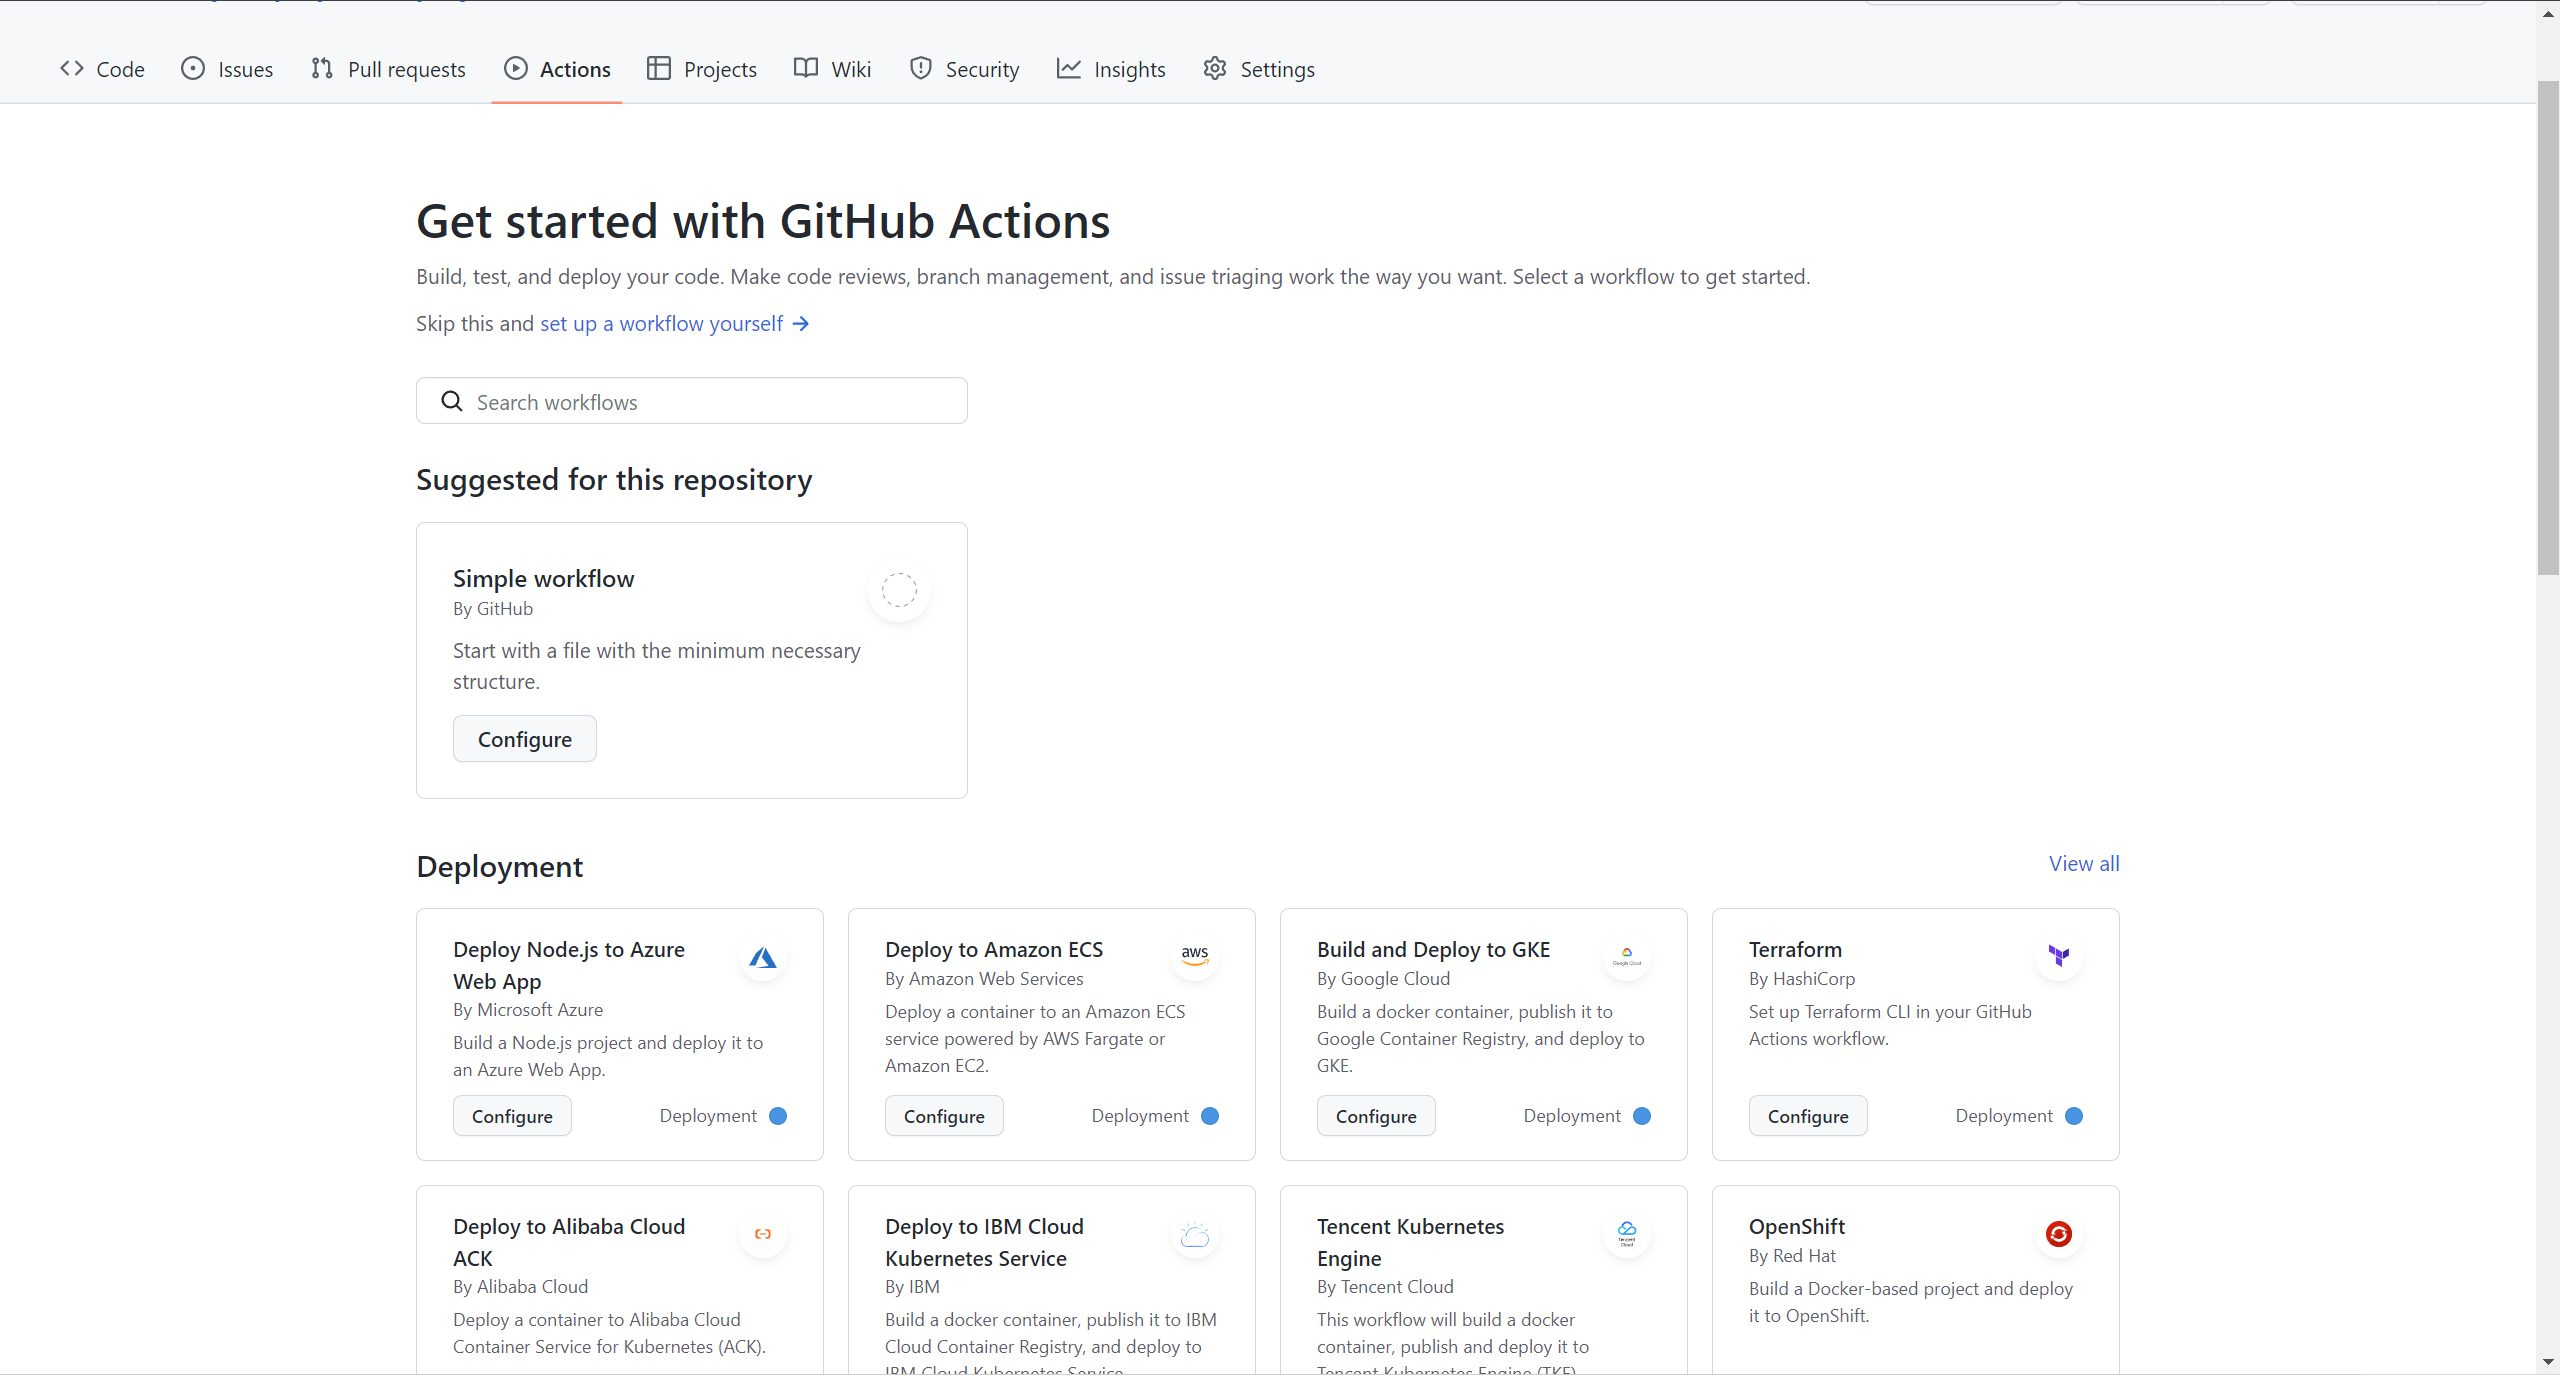
You might have seen that there are all kinds of pre-established configurations for deployment to Azure, AWS, etc. servers, but in this post, we will use the simplest one there.
Click on the configure button in Simple workflow and this view comes out.
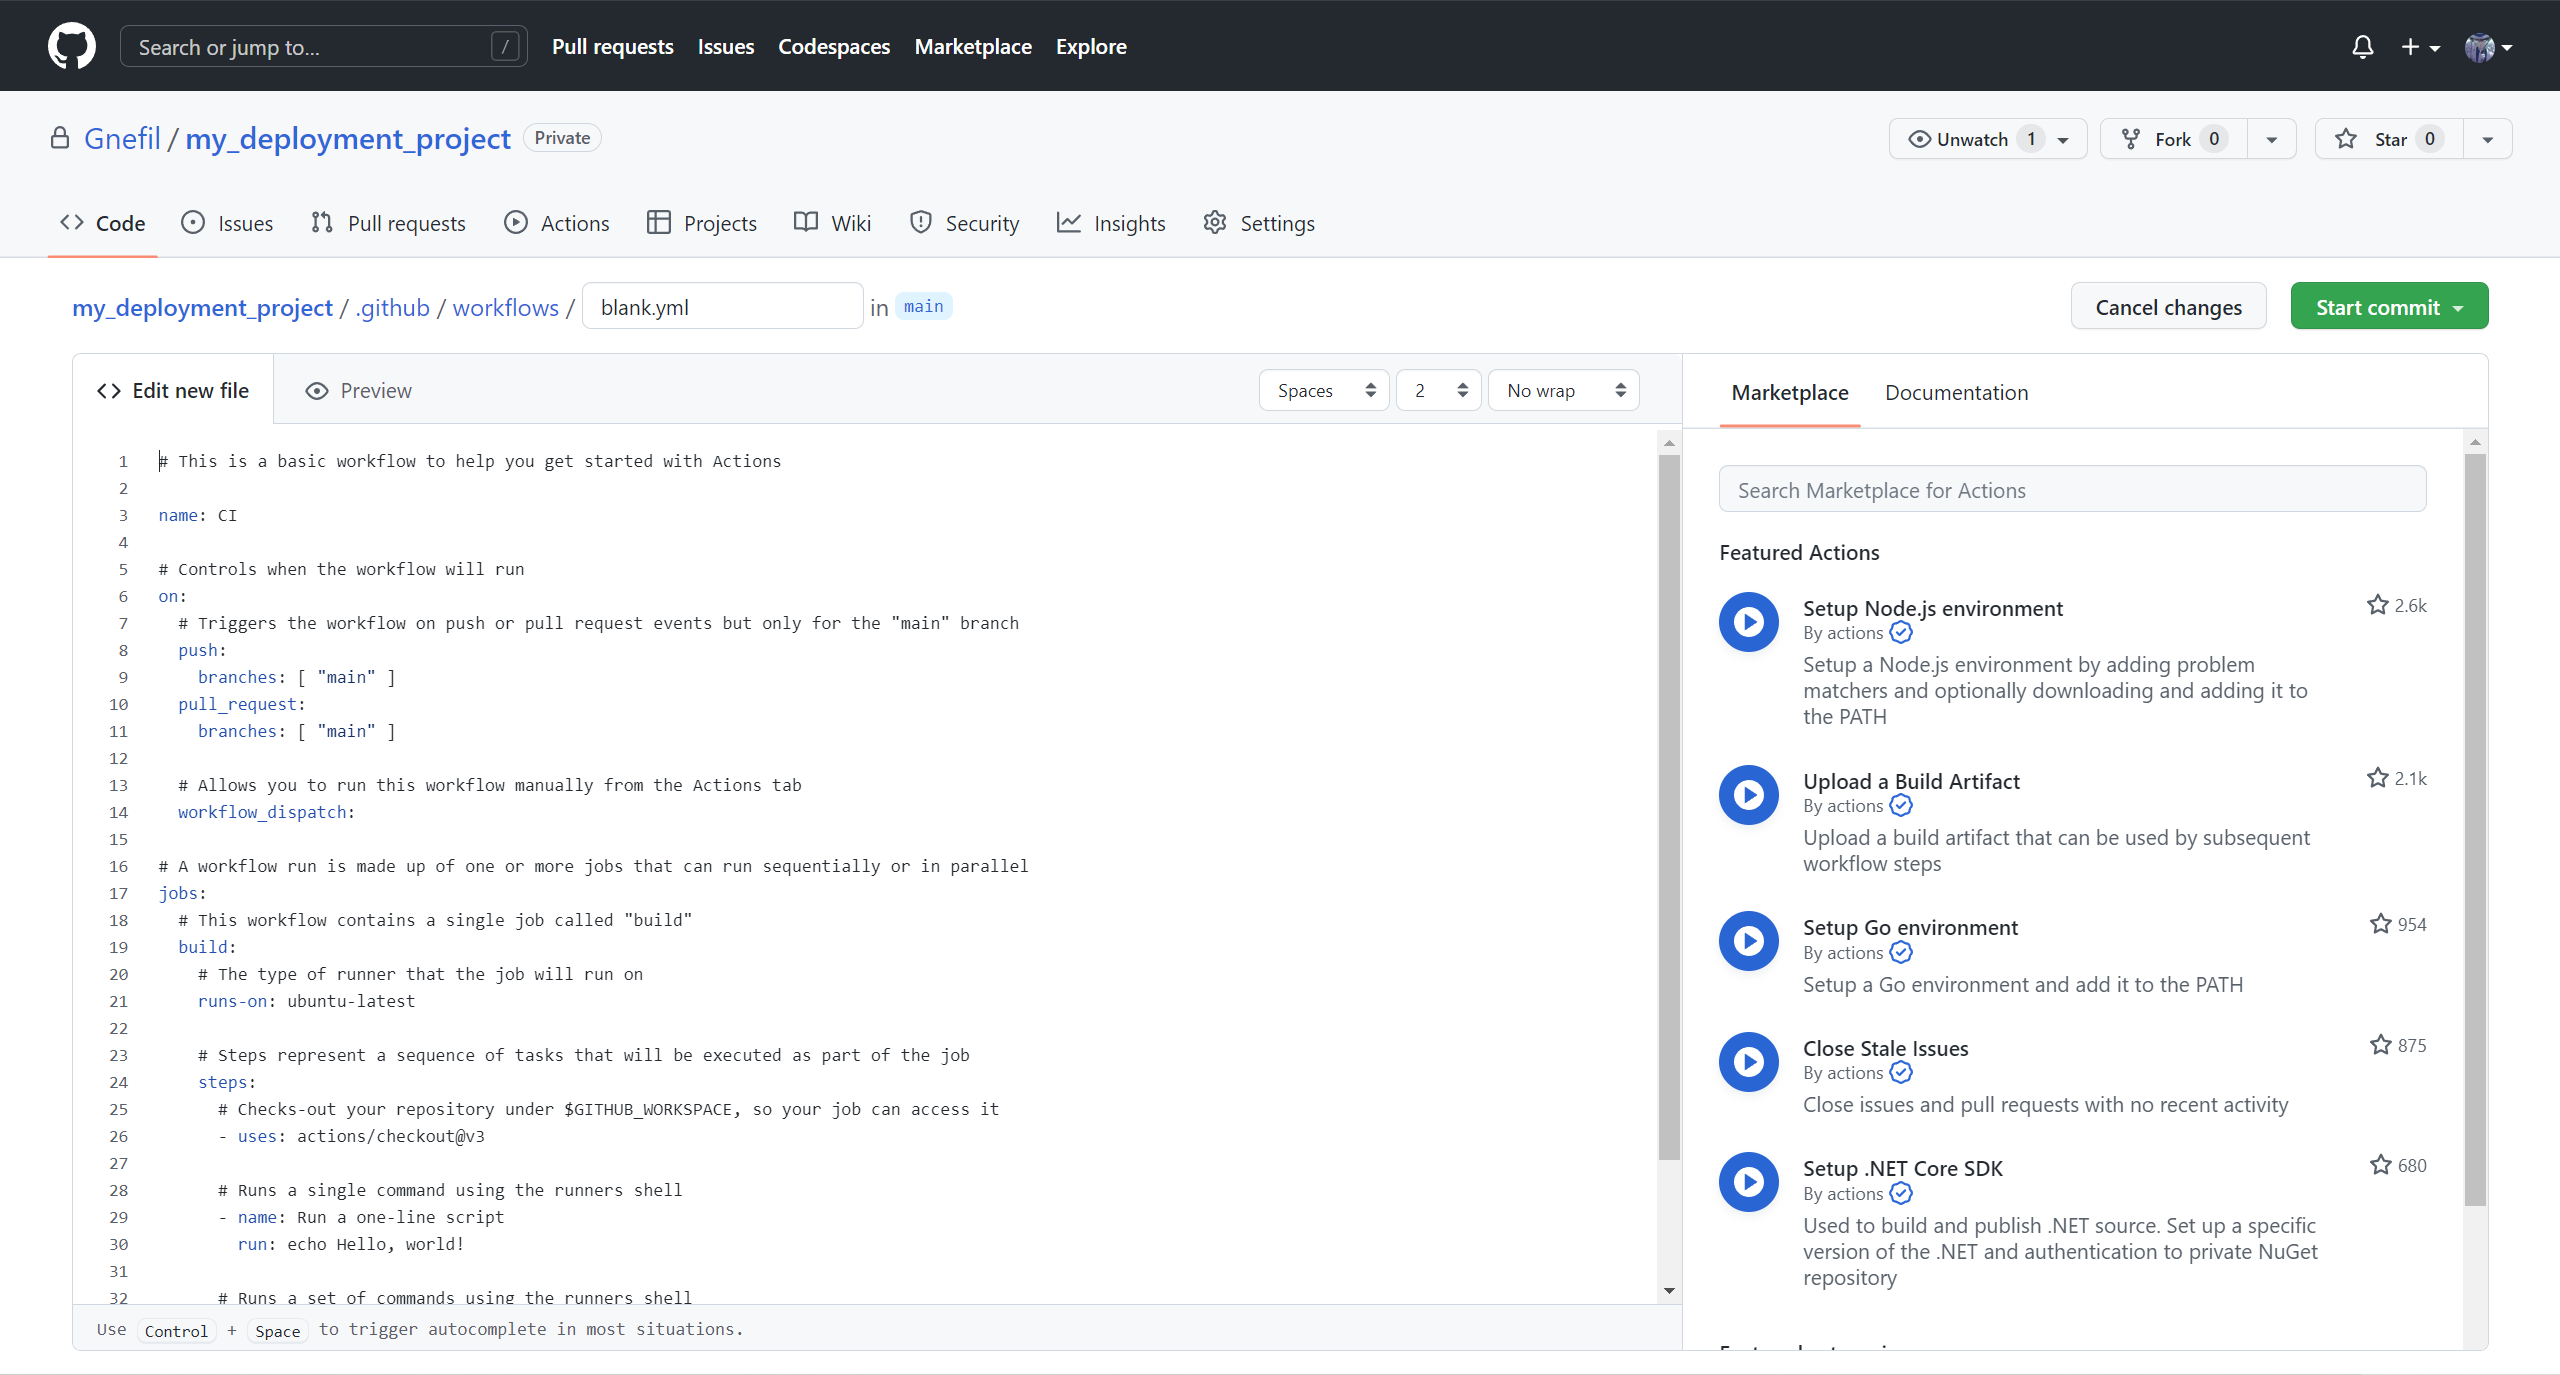
In essence, to run Github Actions, you must create a YAML file under the my_project/.github/workflows/ folder. Name it as you want, I have called it deployment.yml
In this new YAML file, you should see the following content:
自动部署
设置GitHub Actions
如果我们现在看一下repo中的 Actions 标签,我们会发现它是空的。
你可能已经看到,有各种预先建立的配置用于部署到Azure、AWS等服务器,但在这篇文章中,我们将使用那里最简单的配置。
点击 configure 中的 Simple workflow 按钮,这个视图就出来了。
实质上,要运行Github Actions,你必须在my_project/.github/workflows/文件夹下创建一个YAML文件。随意命名,我将其称为deployment.yml。
在这个新的YAML文件中,你应该看到以下内容。
1 | # This is a basic workflow to help you get started with Actions |
Understanding each part of the workflow
All these lines of code may sound like an overhead, but don’t worry, we go through each of them.
namedenotes the name of this deployment workflow, I have called it Github Actions example deployment.onrefers to the moment you want to initialise this automated deployment (automated push to your server), set it to whenpushon branches[ "main" ]only. If you need to include a pull request as a condition, keep it. We are going to remove it for this little project.- Keep the
workflow_dispatchinonas this will allow you to manually start the workflow.
- Keep the
jobsrefers to the set of actions to be carried out. However, it is not as granular asls, andcd, these kinds of commands. A clear distinction between job and job is that they can/need to run in two different runners.Runners are essentially other machines (computers, virtual machines) that run the commands that you list. It can make a copy of your code repo if you need to compile any code that you produce. Notice that each runner is assigned by the name of its operating system, as commands and environments are different for each operating system.
- In the next indented level inside
jobswe raise one job called push-to-server. - Then,
runs-ondenotes the type of operating system we want; the runner we want to run on. Useubuntu-latestas it is quite a popular option. - Finally, inside of
steps, we place all the commands we want into snippets that contribute to the same action.
For now, the file should look like this:
了解workflow的每个部分
所有这些代码行可能听起来像是恶魔的低语(?),但别担心,我们逐一进行讲解。
name表示这个部署workflow的名称,我把它叫做Github Actions example deployment。on指的是你想初始化这个自动部署的时刻(自动推送到你的服务器),把它设置为当push到[ "main"]分支上时。如果你需要包括pull request作为条件,保留它。我们将在这个小项目中删除它。- 保留
workflow_dispatch在on,因为这将允许你手动启动工作流。
- 保留
jobs指的是要执行的行动集合。然而,它不像ls,和cd这些种类的命令那样细化。一个显著区别你需要一个还是多个jobs的方法是,它们可以在两个不同的runners中运行。runners本质上是其他机器(计算机、虚拟机),运行你列出的命令。如果你需要编译你产生的任何代码,它可以对你的代码 repo 进行复制。注意,每个runner都是由其操作系统的名称来分配的,因为每个操作系统的命令和环境都是不同的。
- 在
jobs里面的下一个缩进层,我们提出了一个名为push-to-server的job。 - 然后,
runs-on表示我们想要的操作系统的类型;我们想要运行的runner。使用ubuntu-latest,因为它是一个相当流行的选项。 - 最后,在
steps里面,我们把所有我们想要的命令放在有助于同一行动的片段中。
现在,该文件应该是这样的。
1 | name: Github Actions example deployment |
添加步骤,自动推送代码到服务器上
提醒一下,我们的最终目标是在我们进行git推送时自动将代码部署到服务器上。为了完成这个目标,我们可以将我们的步骤划分为。
- 将整个repo复制到runner中
- 通过SSH访问远程服务器
- 将runner中的repo拷贝到远程服务器上
为了完成步骤1,我们写下以下代码:
1 | uses: actions/checkout@v3 |
这一行将扫描你的repo,以便你的workflow可以操作它。
第2步主要是将你的SSH密钥存储到runner中:
1 | env: |
现在,对这个片断做一些解释。关键字env表示你想在下面的片段中使用的任何变量,以避免冗余。run后面有一个|表示你在同一步骤中编写多个命令。而在这个步骤里面,你的run命令通过调用env.下的变量(例如env.SSH_KEY)来检索一个变量,这需要用${{ }}括起来,这样就不会把这个词当成一个字符串。
之后,SSH密钥必须存储在文件名为 ~/.ssh/id_rsa 的文件夹中。chmod将模式改为只读,因为我们不想在任何情况下修改SSH密钥。
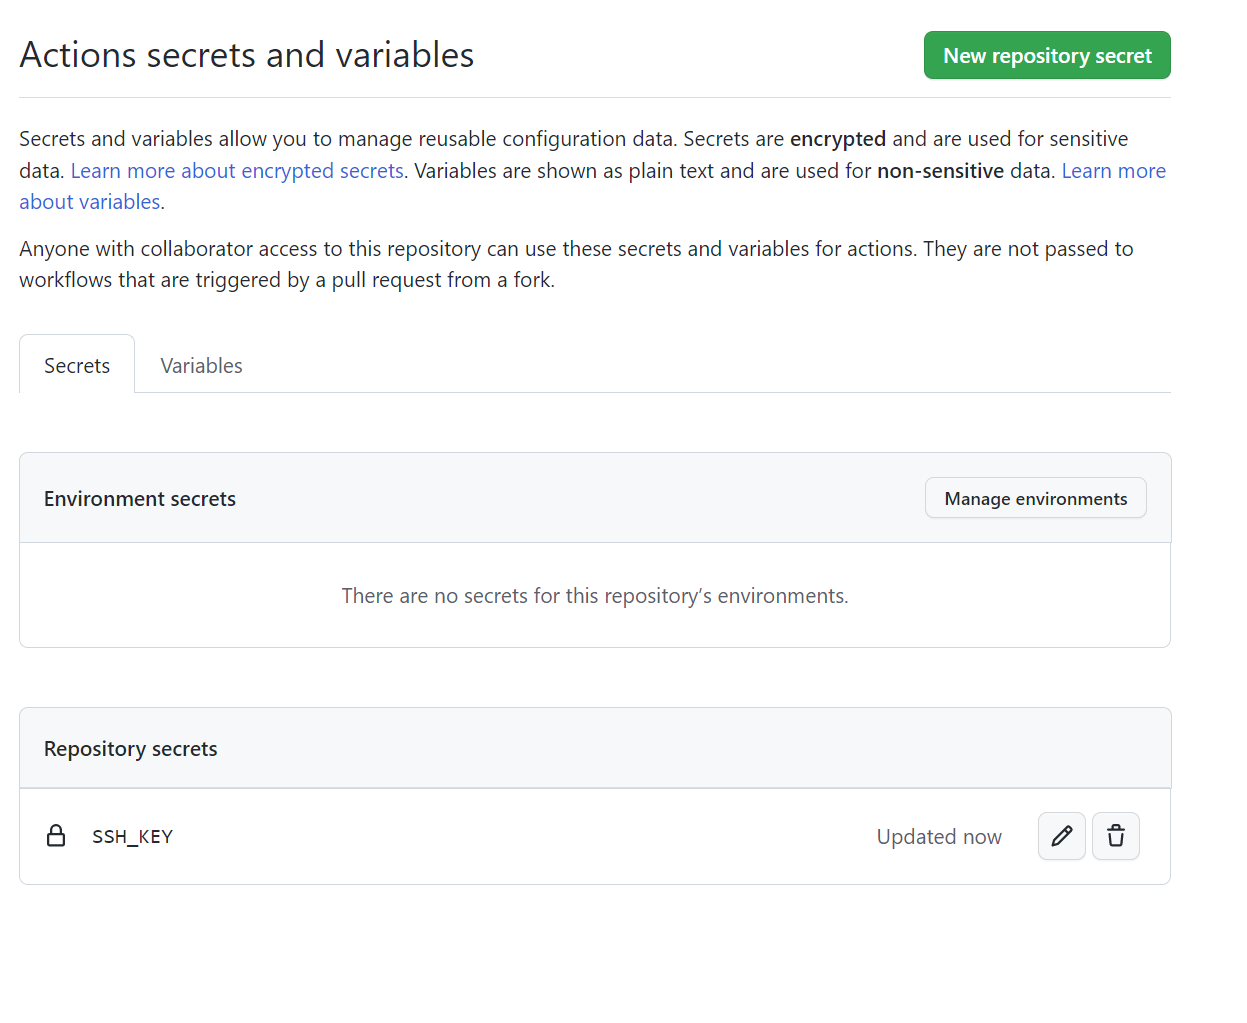
另外,你可能已经注意到,在代码中明确存储SSH密钥或其他合理的信息确实不安全。因此,Github提供了一个名为Environment Secrets的有用功能。它在Github repo的 “Settings “标签中,”Security”,然后是 “Actions”。
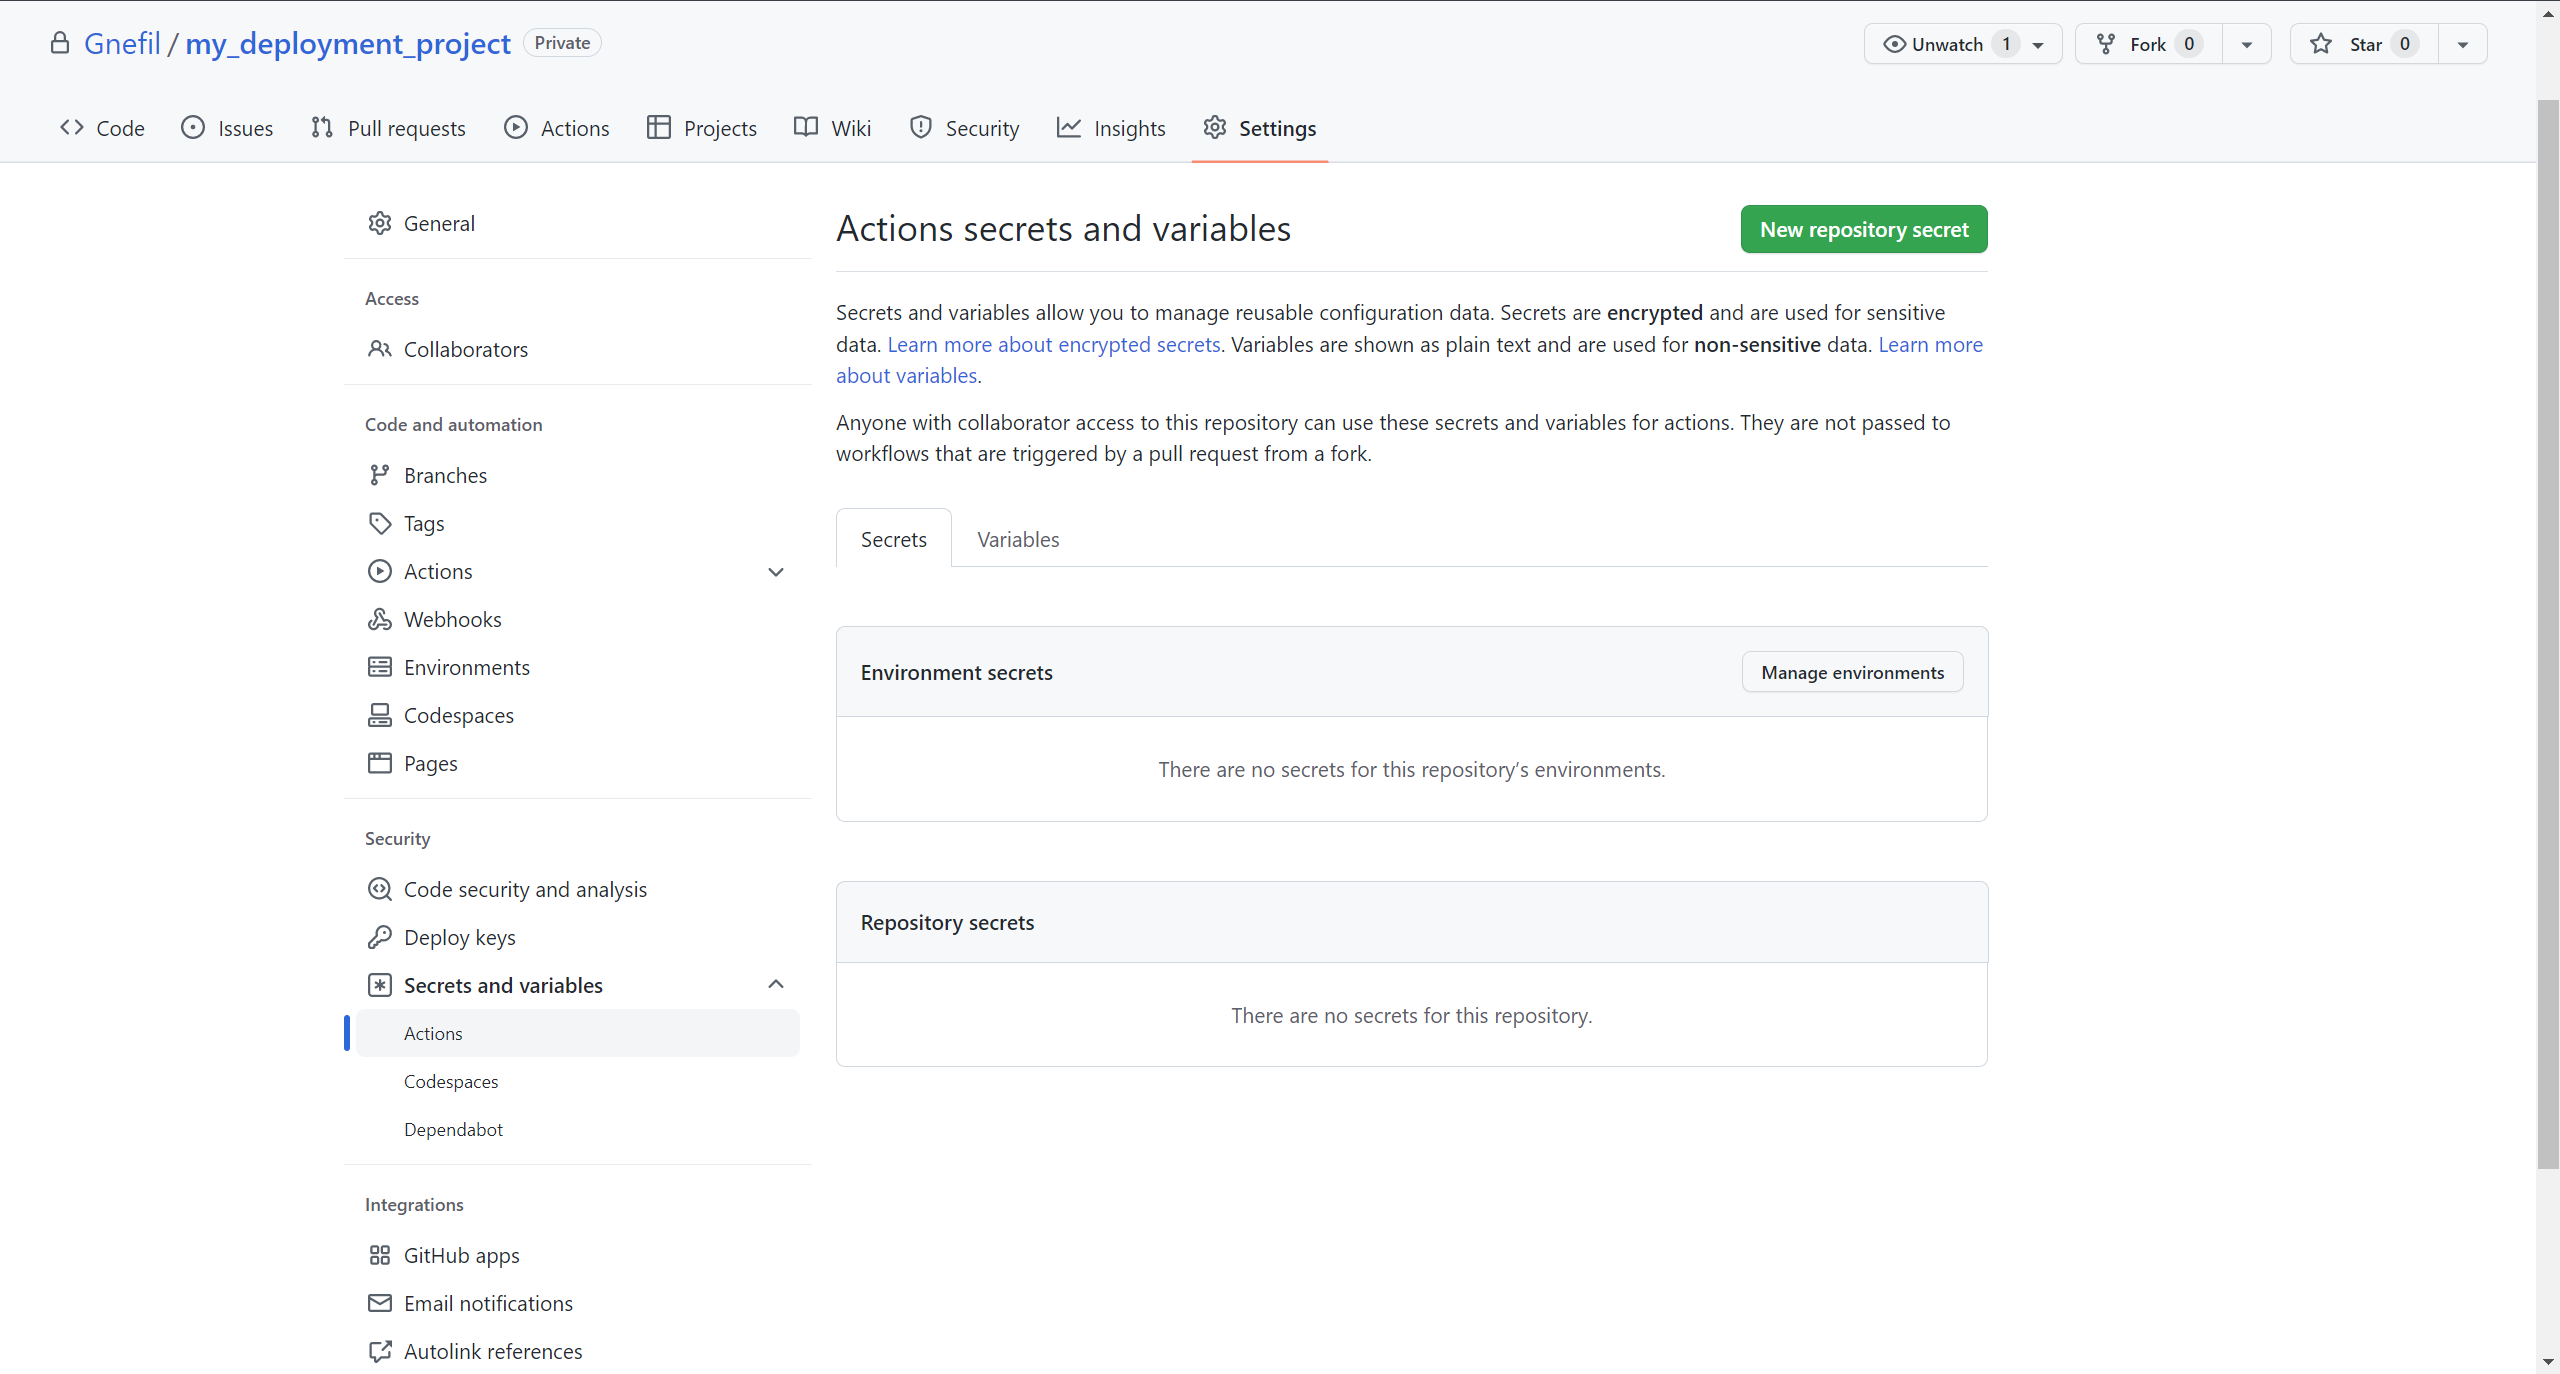
点击 New Repository Secret 并添加你的SSH密钥。我把它叫做SSH_KEY。一旦你完成了这些,你就会在Repository Secrets中看到SSH_KEY。现在可以通过变量名称secrets.SSH_KEY在Github Actions中调用这个。
然后我们可以将我们的步骤2改为:
1 | env: |
最后,在步骤3中,我们使用scp,将runner当前文件夹的内容复制到远程服务器。
从这个截图中,我们可以看到,runner的当前工作目录已经是 repo 本身。但我们想复制整个 repo,因此,我们cd出一个级别,并使用./my_deployment_project作为scp的复制源。顺便说一下,每个workflow的运行细节可以在Github的Actions标签中找到。点击任何一个workflow以获得更多细节。
1 | run: | |
scp,如果你对它不是那么熟悉的话,它是指通过使用SSH来确保CoPy的安全。这个命令的字面意思是 “将当前文件夹复制到这个user@server:this_folder”。-o是为了禁用一个选项,当这台电脑第一次试图通过SSH连接到这个服务器时,这个选项会发出警告信息,-r是为了递归复制。
现在,如果一切顺利,你应该在你的服务器端看到。
1 | Server |
然而,如果你多次重复这个过程,你会发现这个错误。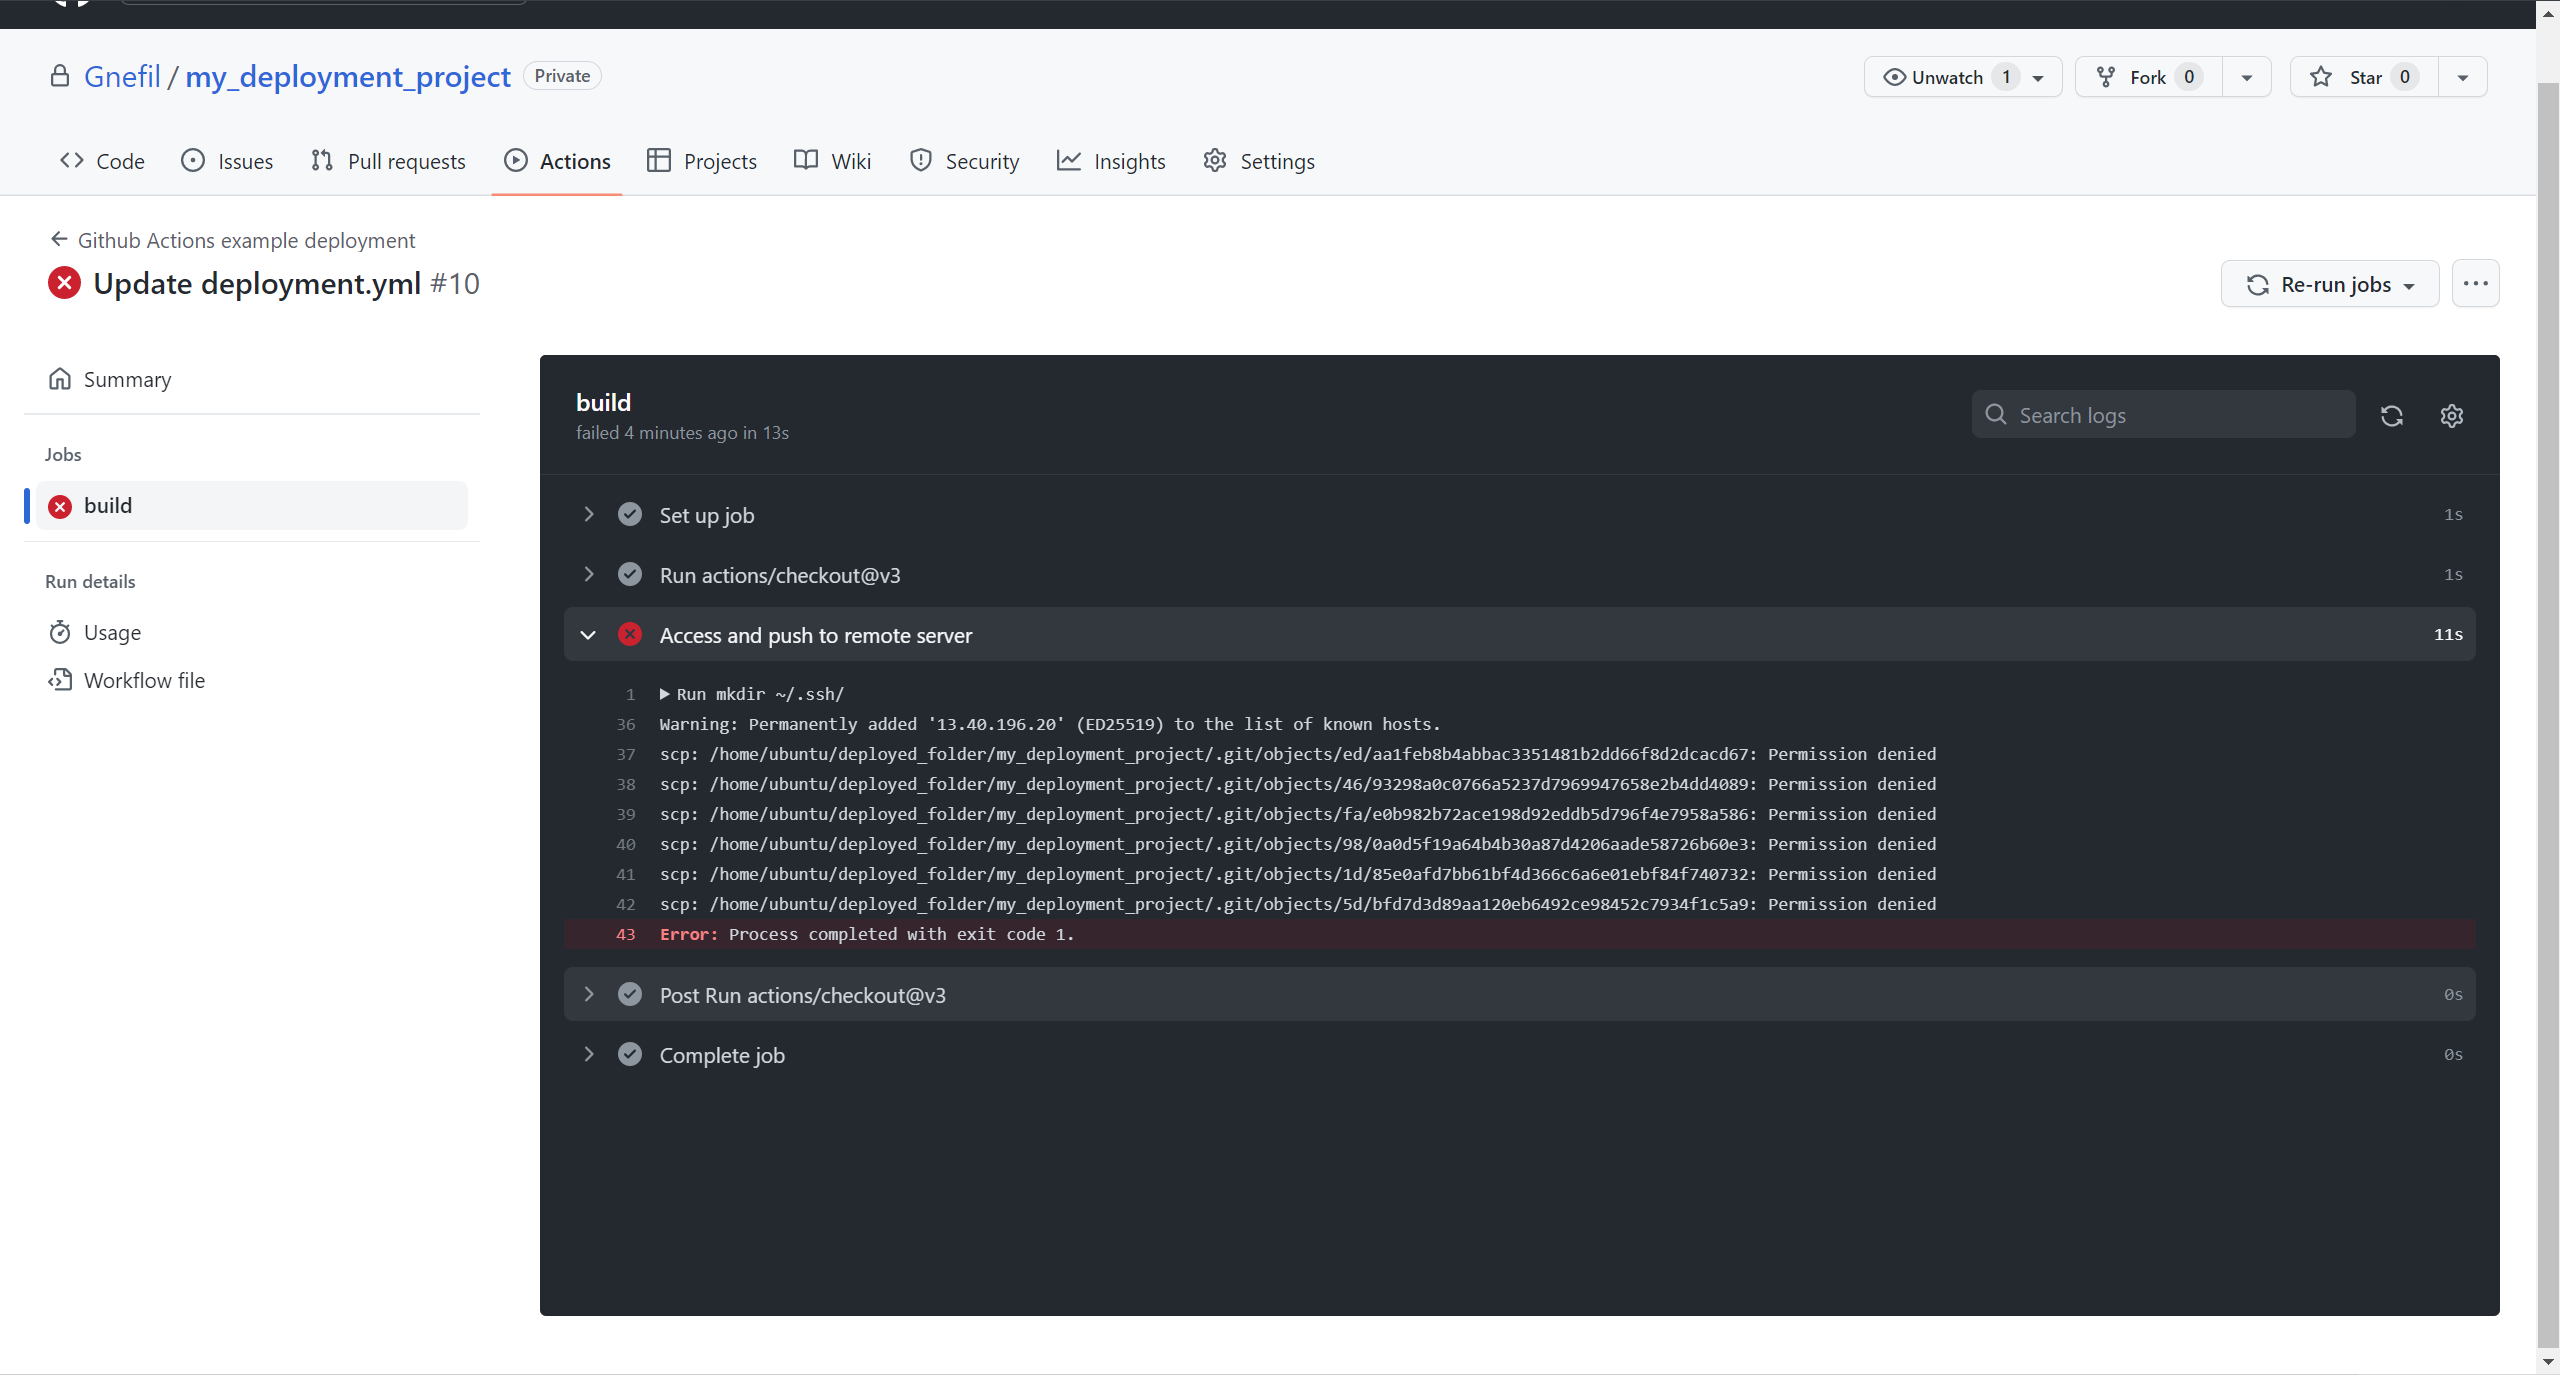
这是因为第二次我们试图在同一个文件夹中scp,我们基本上是在替换原来的那些。为了避免这种情况,一个简单的解决方法是先把代码临时推送到临时文件夹,把它的内容移到生产文件夹,然后删除临时文件夹。
1 | run: | |
在某些时刻,这将在服务器中自动发生:
1 | Server |
当然,这不是一个解决替换问题的正确方案,因为它不会删除你在最近一次推送中删除的任何旧文件。另一个不是很解决问题的解决方案(就像这个)是在每次部署时删除整个生产文件夹并重新添加它。然而,这将暂时断掉本来正在运营的网站。更高级、更完整的技术是 “清除 “这两个文件夹之间的差异。或者使用两个备用的文件夹位置,当一个正在部署时,另一个承担起的运行的责任。
然后……我们就完成了! 现在你有了一个简单的workflow,每当你向主分支进行git push时,都会自动将你的代码推送到~/deployed_folder! 这就是最后产生的代码。
1 | name: GitHub Actions example deployment |
根据你的需要进行个性化定制
这只是一个非常初级和简单的部署脚本,可以根据你自己的需要来加强。例如,我为我的博客使用的版本是:
1 | name: Blog test and deploy |
在这个脚本中,我通过引入npm(Node Package Manager)命令来节省安装、编译和测试的时间,我需要用这些命令来渲染我的博客。在使用GitHub Actions之前,我需要用hexo g在电脑上编译整个项目(hexo是一个基于Node的博客框架),然后用hexo dpush,只pushpublic文件夹。现在我使用GitHub Actions,我可以忘掉这一切,直接git push。Workflow会处理剩下的问题。