Aims
In this post, we are going to learn how to make a simple automated deployment using GitHub Actions. Deployment may have various meanings depending on the context. In this particular one, we are talking about uploading automatically the code pushed to GitHub into a server (like AWS EC2). This is helpful in cases where we need to take repetitive actions to set code into production.
In my case, it increases a lot of efficiencies when updating my blog. I find it a bit redundant to repeat the same steps once I upload something new to the blog:
1 | - Have the post written. |
After setting up GitHub Actions, I automated it into:
1 | - Have the post written. |
Preparatives
Here are the key roles of this deployment.
Github repo
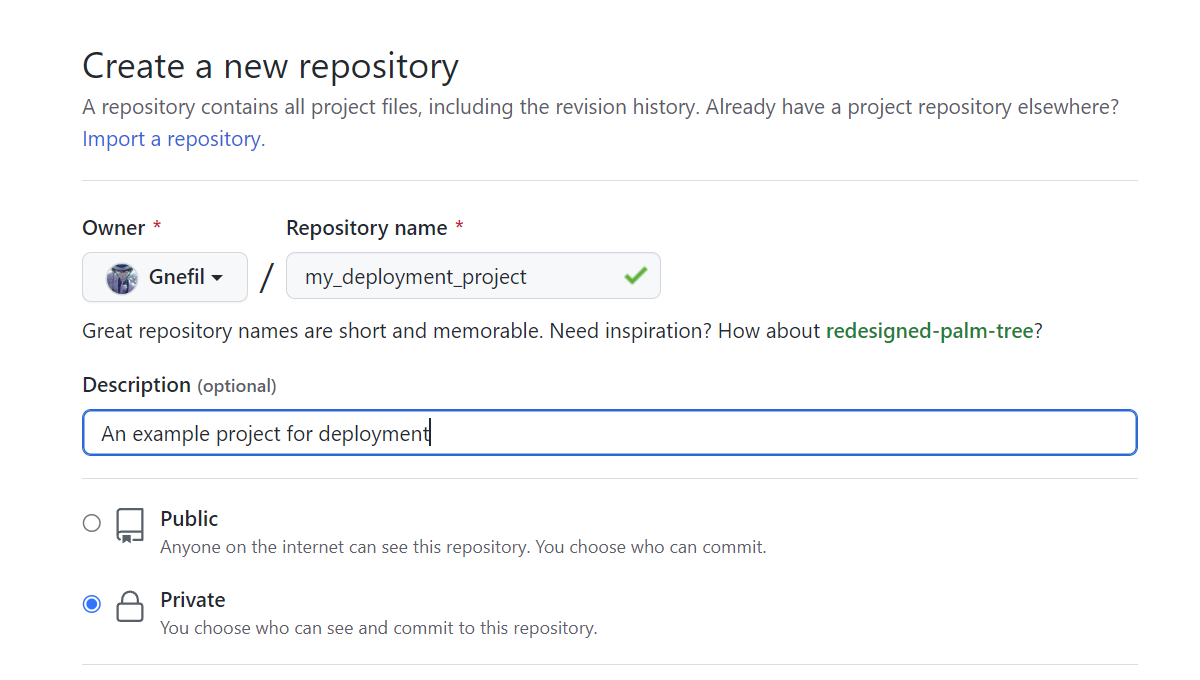
First of all, we assume that we have a GitHub account. We will start a new repo as an example and call it “my_deployment_project”, and place clone it somewhere in your computer.
1 | Computer |
Server
A hosted server like AWS EC2, with a folder that is prepared to be posted to the public internet. This can be achieved via Apache, Nginx, or other web-serving tools. You should have your SSH key to access the server as well.
To present this deployment with an example, I created a deployed_folder in my home directory on the server.
1 | Server |
Right now it is empty.
Automate deployment
Set up GitHub Actions
If we look right now at our Actions tab in the repo, we find it empty.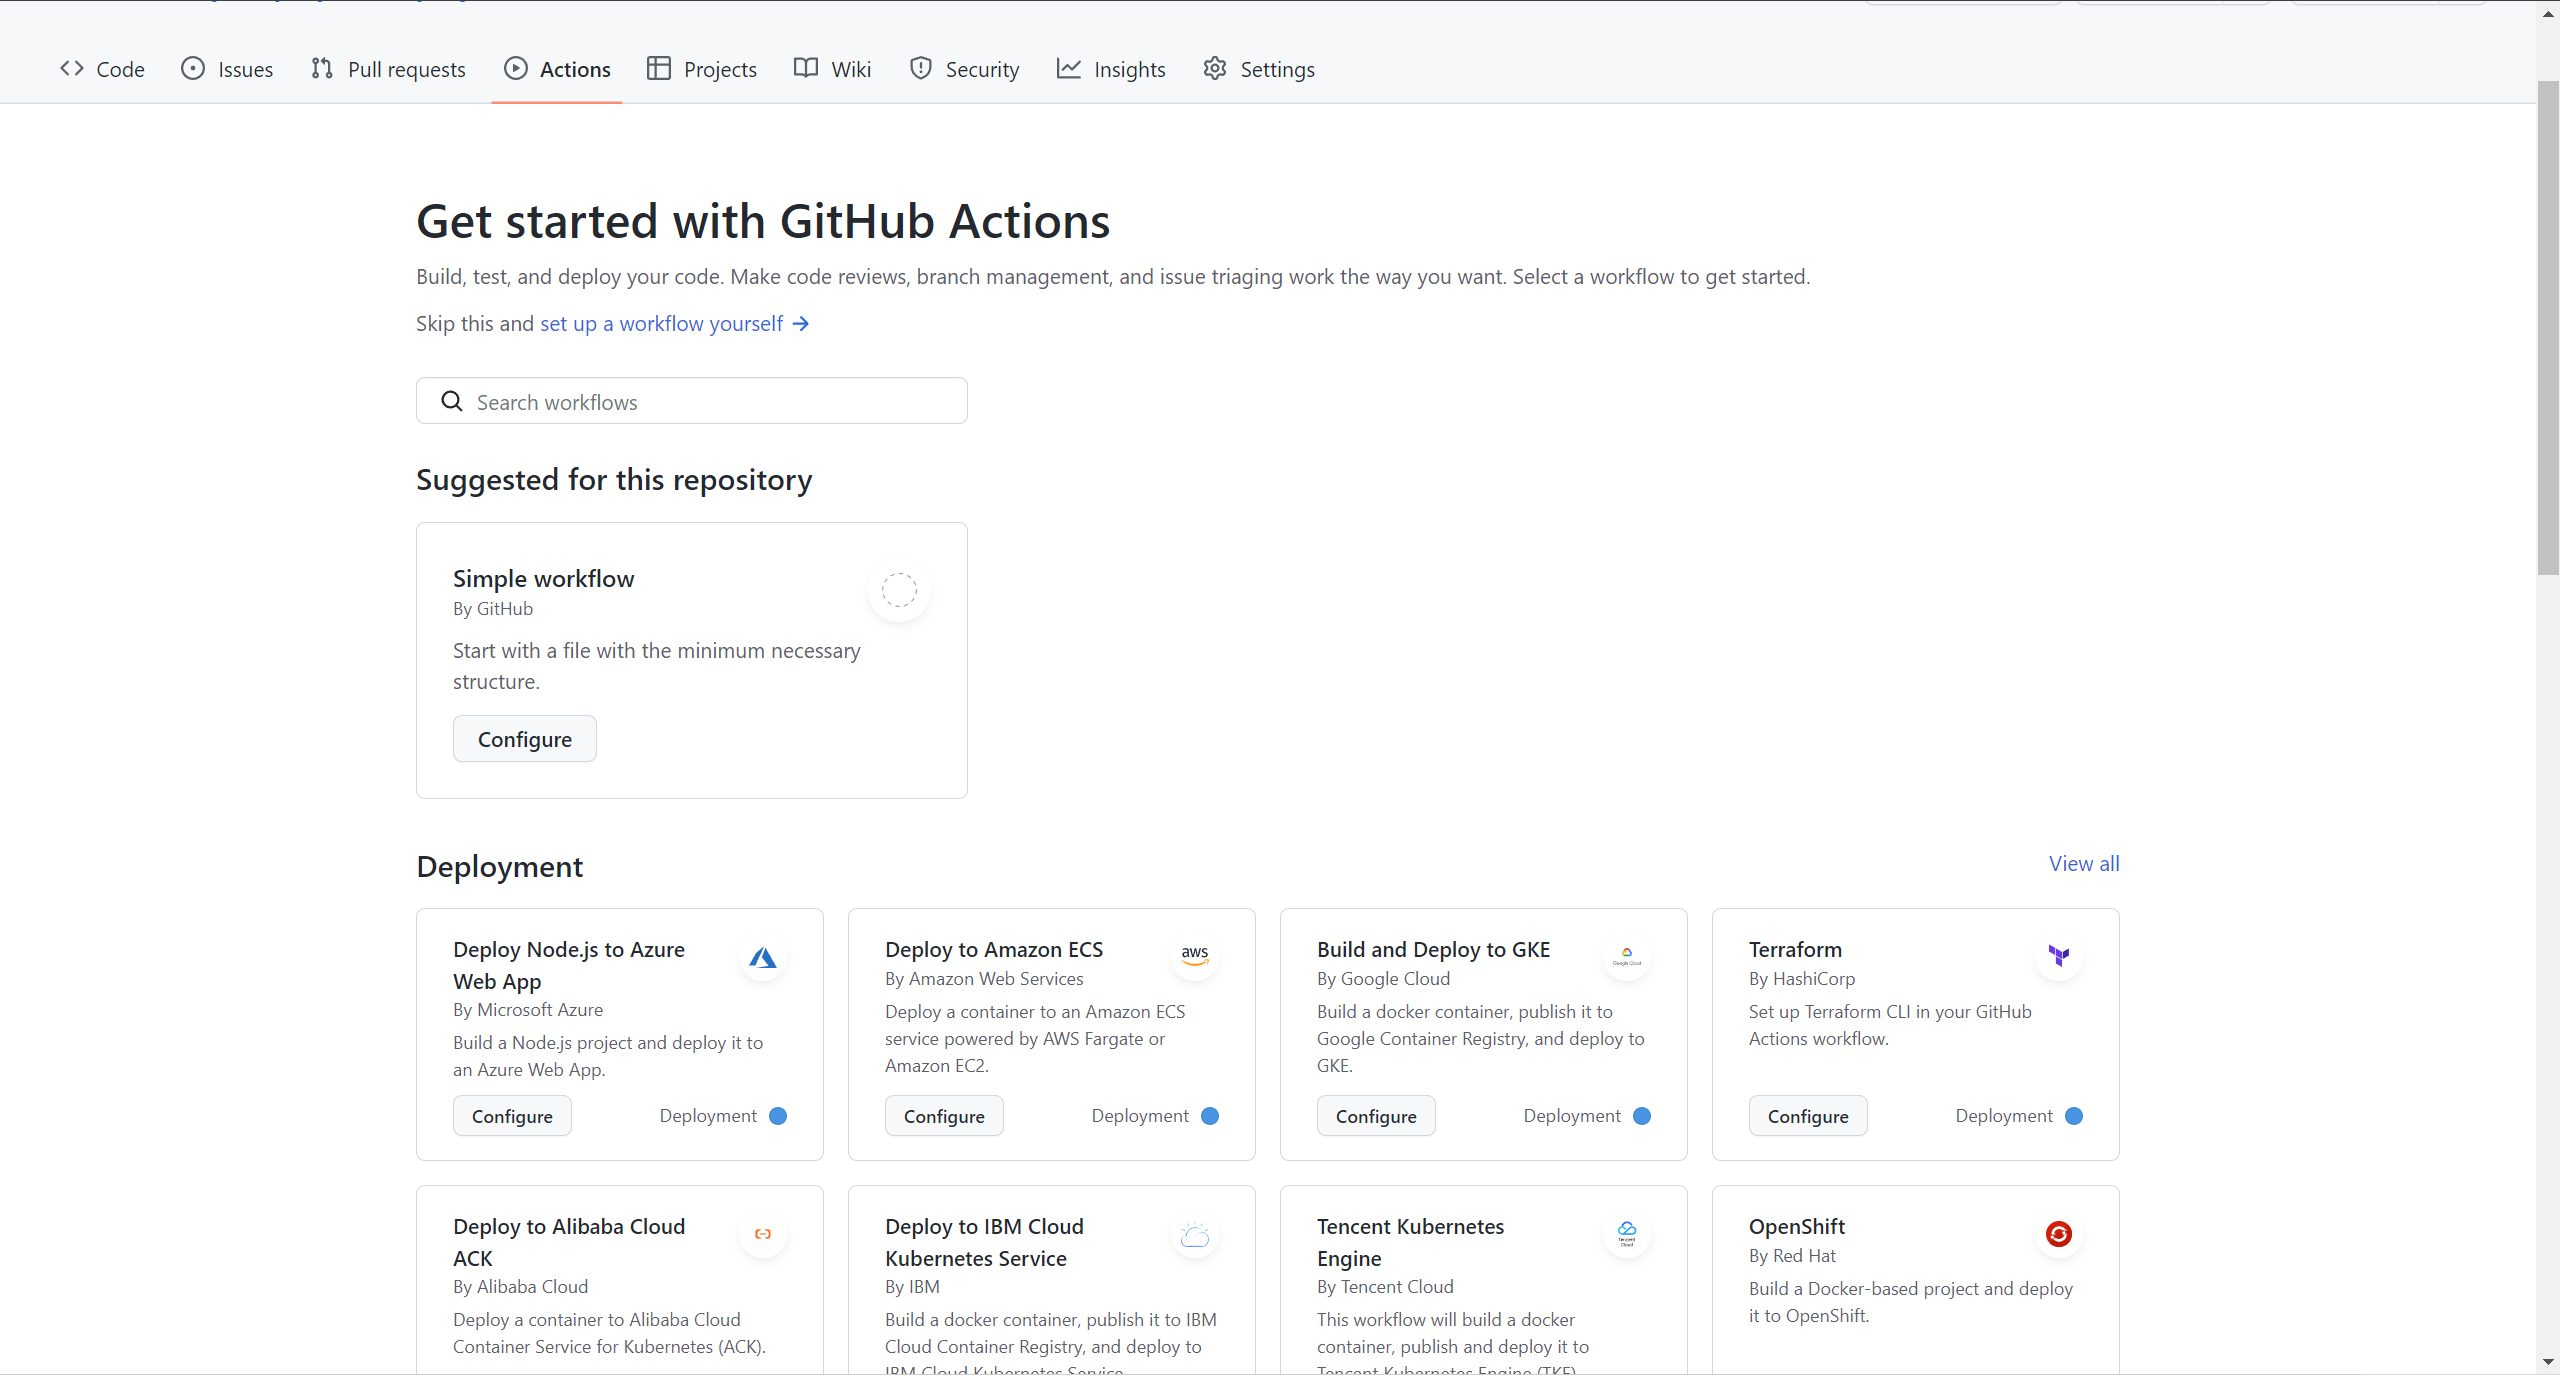
You might have seen that there are all kinds of pre-established configurations for deployment to Azure, AWS, etc. servers, but in this post, we will use the simplest one there.
Click on the configure button in Simple workflow and this view comes out.
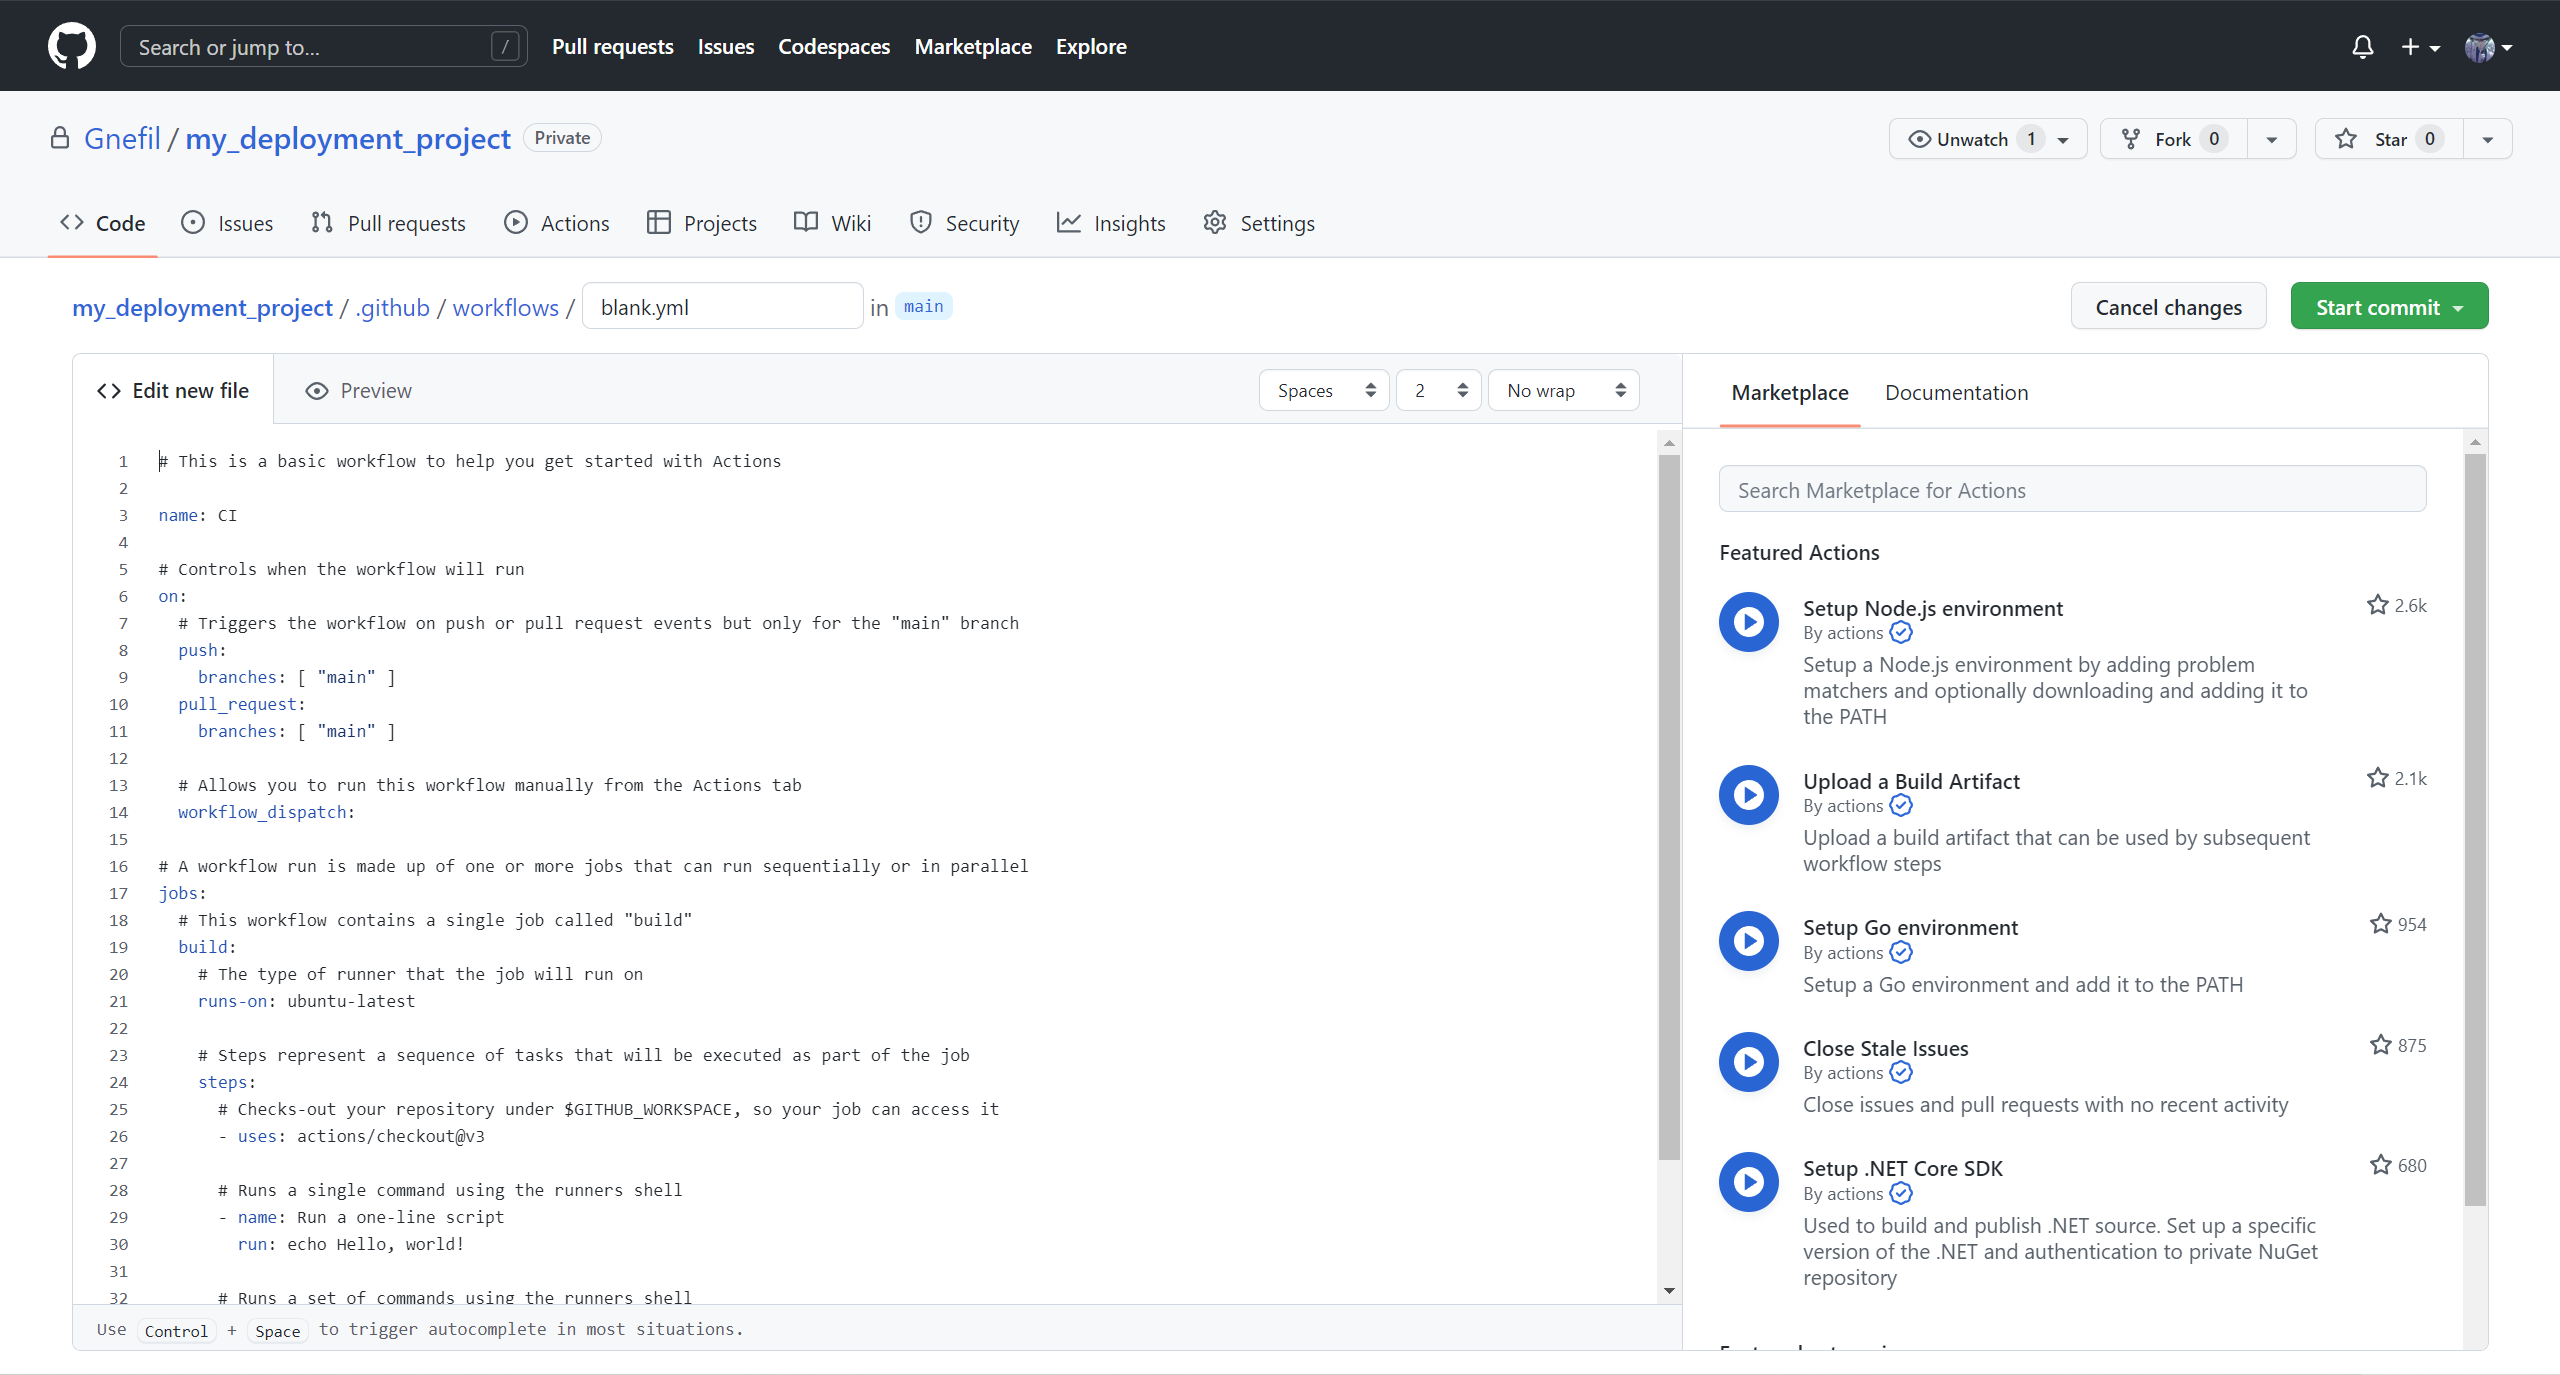
In essence, to run Github Actions, you must create a YAML file under the my_project/.github/workflows/ folder. Name it as you want, I have called it deployment.yml
In this new YAML file, you should see the following content:
1 | # This is a basic workflow to help you get started with Actions |
Understanding each part of the workflow
All these lines of code may sound bad enough, but don’t worry, we go through each of them.
namedenotes the name of this deployment workflow, I have called it Github Actions example deployment.onrefers to the moment you want to initialise this automated deployment (automated push to your server), set it to whenpushon branches[ "main" ]only. If you need to include a pull request as a condition, keep it. We are going to remove it for this little project.- Keep the
workflow_dispatchinonas this will allow you to manually start the workflow.
- Keep the
jobsrefers to the set of actions to be carried out. However, it is not as granular asls, andcd, these kinds of commands. A clear distinction between job and job is that they can/need to run in two different runners.Runners are essentially other machines (computers, virtual machines) that run the commands that you list. It can make a copy of your code repo if you need to compile any code that you produce. Notice that each runner is assigned by the name of its operating system, as commands and environments are different for each operating system.
- In the next indented level inside
jobswe raise one job called push-to-server. - Then,
runs-ondenotes the type of operating system we want; the runner we want to run on. Useubuntu-latestas it is quite a popular option. - Finally, inside of
steps, we place all the commands we want into snippets that contribute to the same action.
For now, the file should look like this:
1 | name: Github Actions example deployment |
Add steps to push code to the server automatically
Reminding that our final goal is to deploy the code to the server automatically whenever we make a git push. In order to complete that, we can divide our steps as:
- Copy the entire repo to the runner
- Access the remote server through SSH
- Copy the repo in the runner to the remote server
To complete step 1 we write down the following code:
1 | uses: actions/checkout@v3 |
This line scans through your repo so that your job can manipulate it.
Step 2 is essentially storing your SSH Key into the runner:
1 | env: |
Now, some explanations for this snippet. The keyword env denotes any variables that you want to use in the following snippet, to avoid redundancy. run followed by a | means that you are writing multiple commands in the same step. And inside this step, your run command retrieves a variable via invoking a variable under env. (e.g. env.SSH_KEY), and this needs to be enclosed by ${{ }} so that the word is not taken literary as a string.
Later, the SSH key must be stored in a folder with file name ~/.ssh/id_rsa. chmod changes the mode to read-only, which makes sense as we don’t want to modify the SSH key in any of the cases.
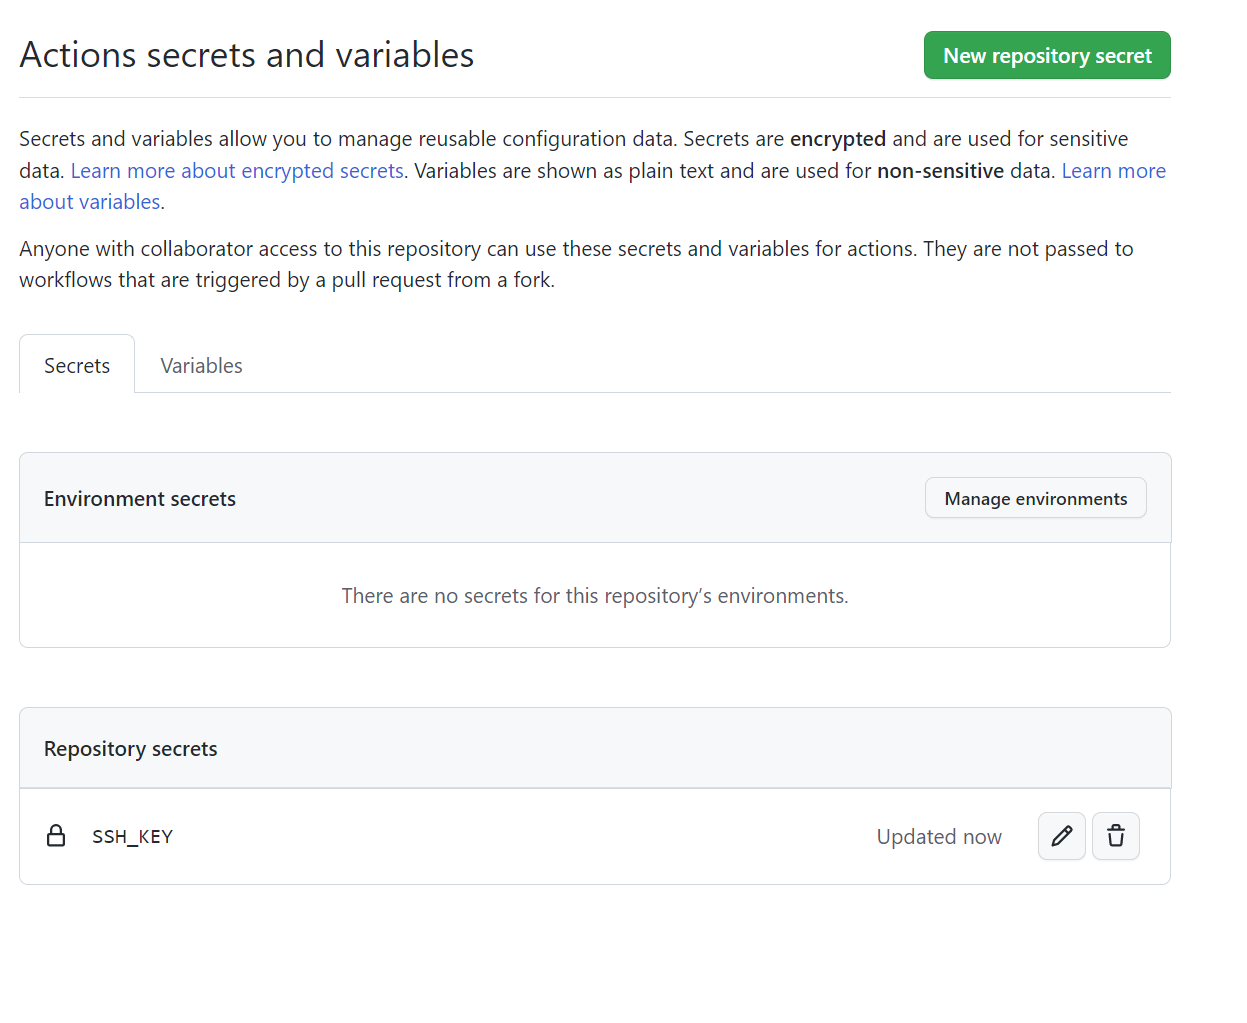
Also, you might have noticed that it is really unsafe to store SSH keys or other sensible pieces of information explicitly there in the code. Therefore, Github provides a helpful function called Environment Secrets. It is in the Settings tab in the Github repo, Security, and then Actions.
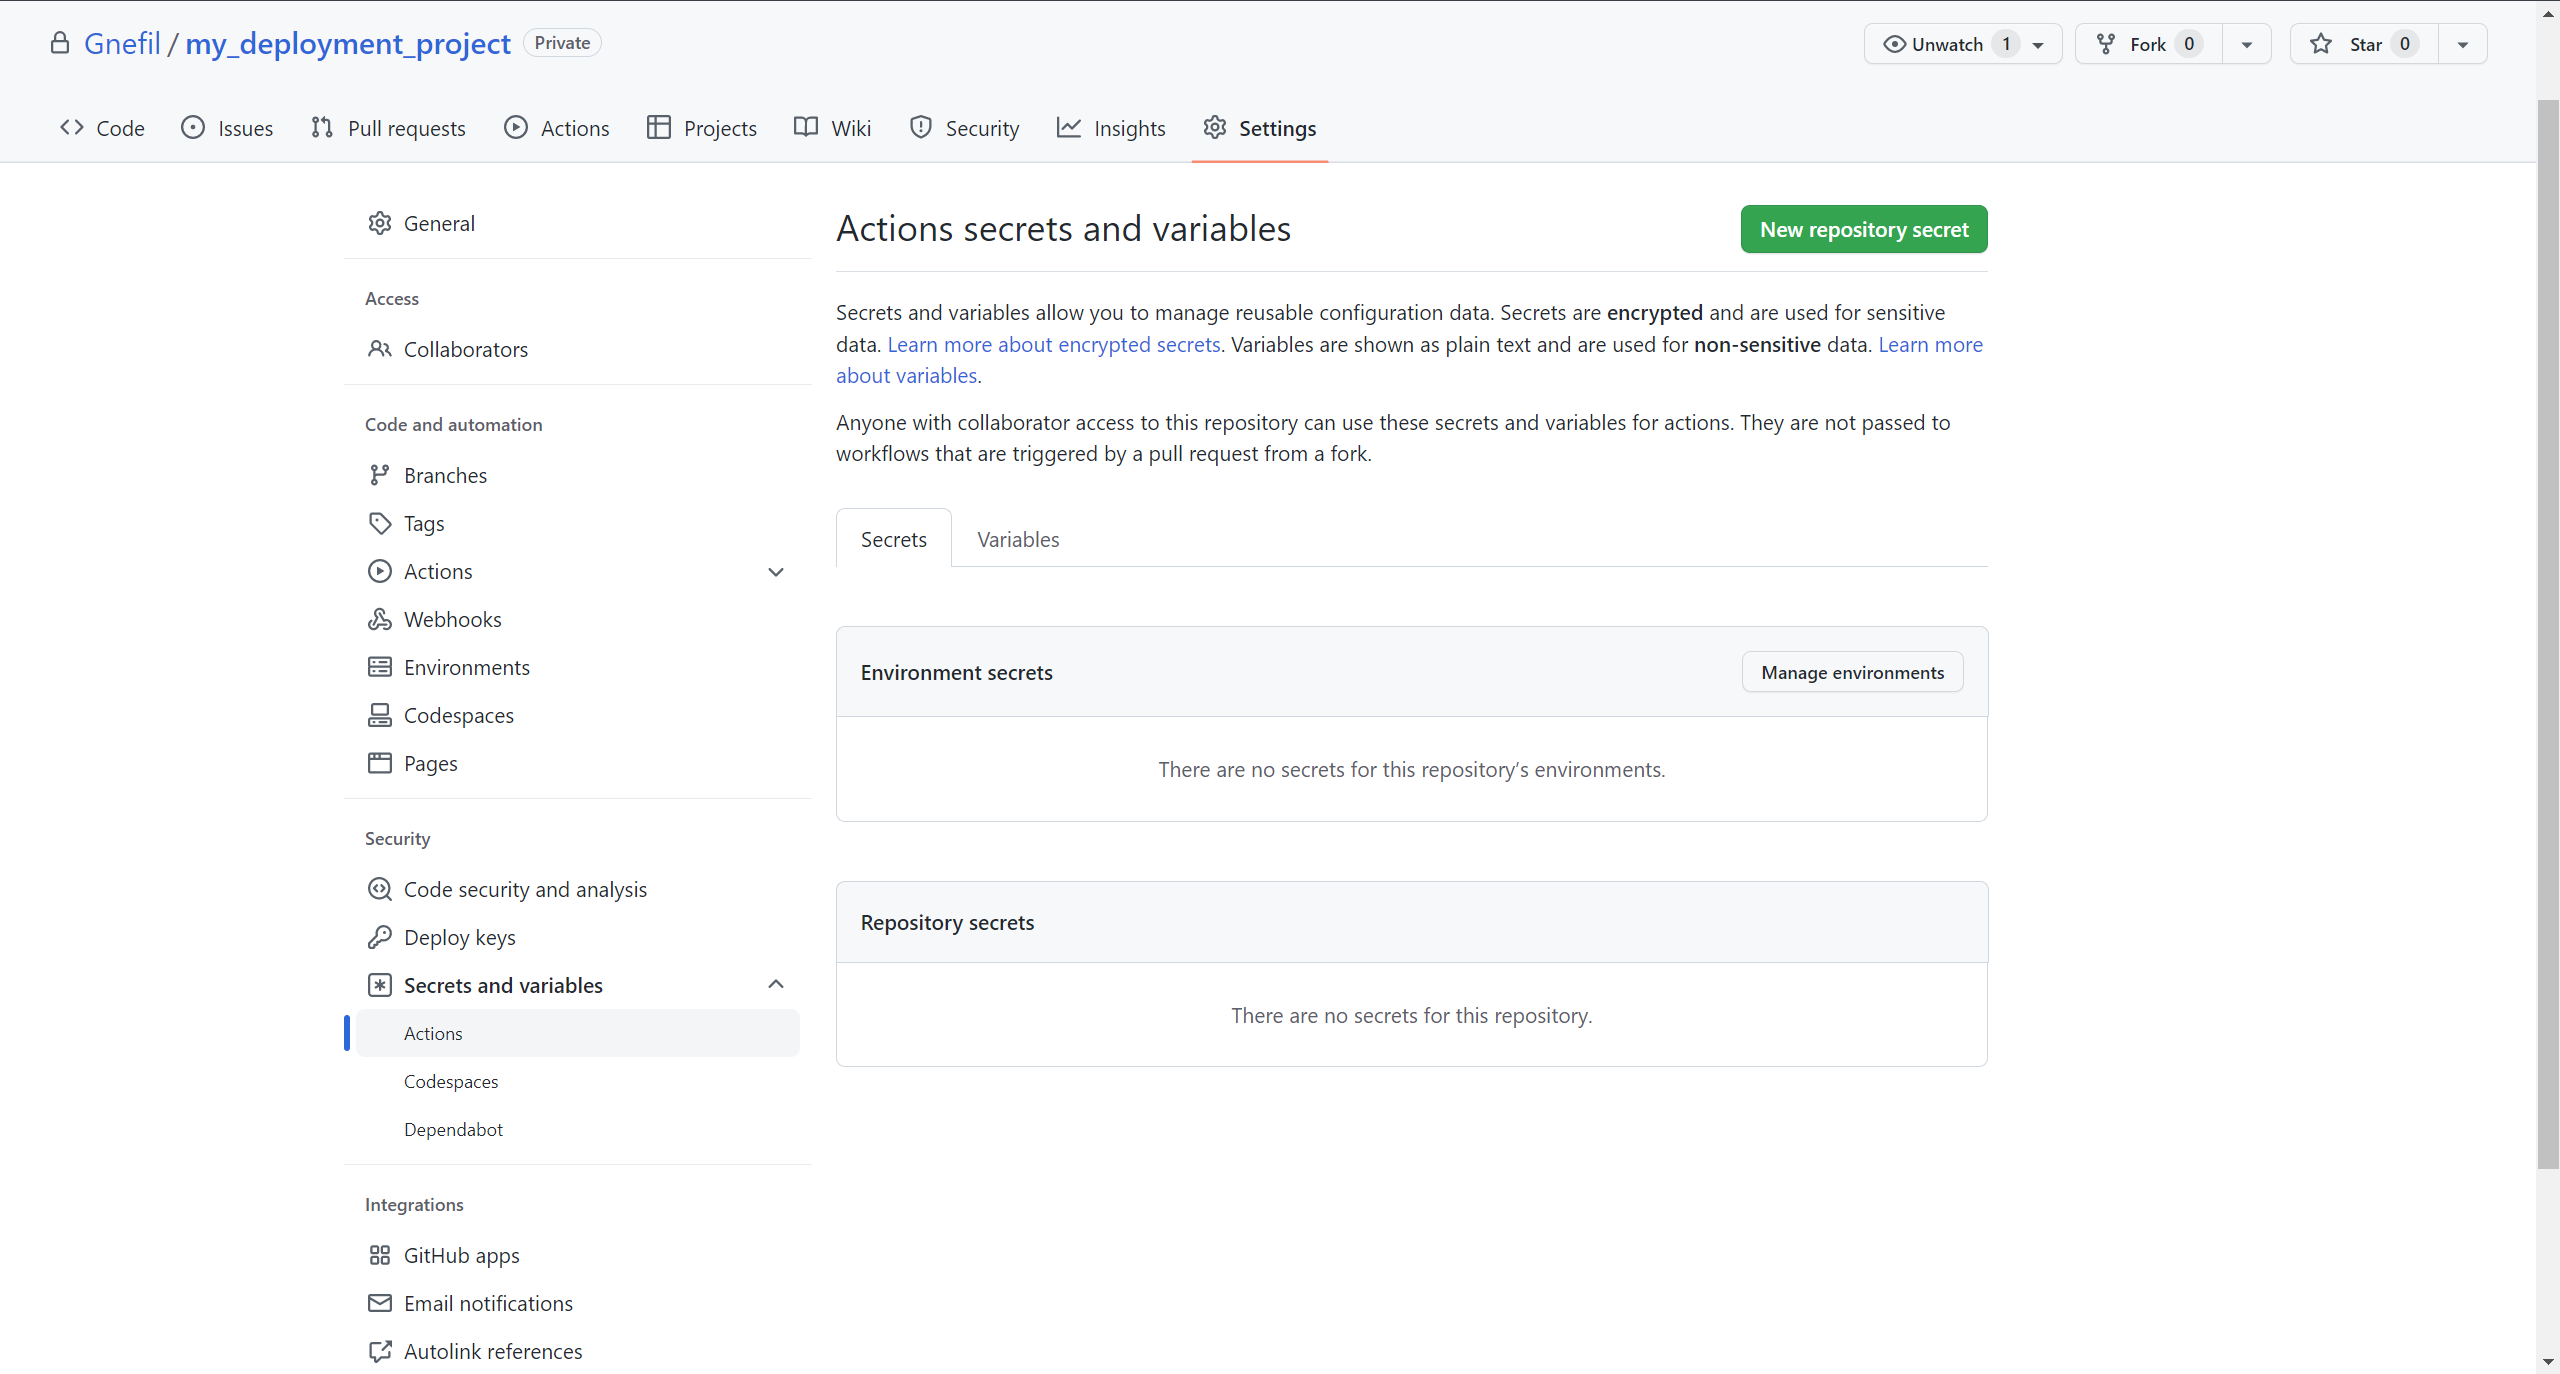
Click on New Repository Secret and add your SSH key. I have called it SSH_KEY. Once you have done that, you will see SSH_KEY in the Repository Secrets. And this can be now invoked in Github Actions by variable name secrets.SSH_KEY.
Then we can change our step 2 to:
1 | env: |
Finally, in step 3 we make use of scp, to copy the contents of the current folder of the runner into the remote server.
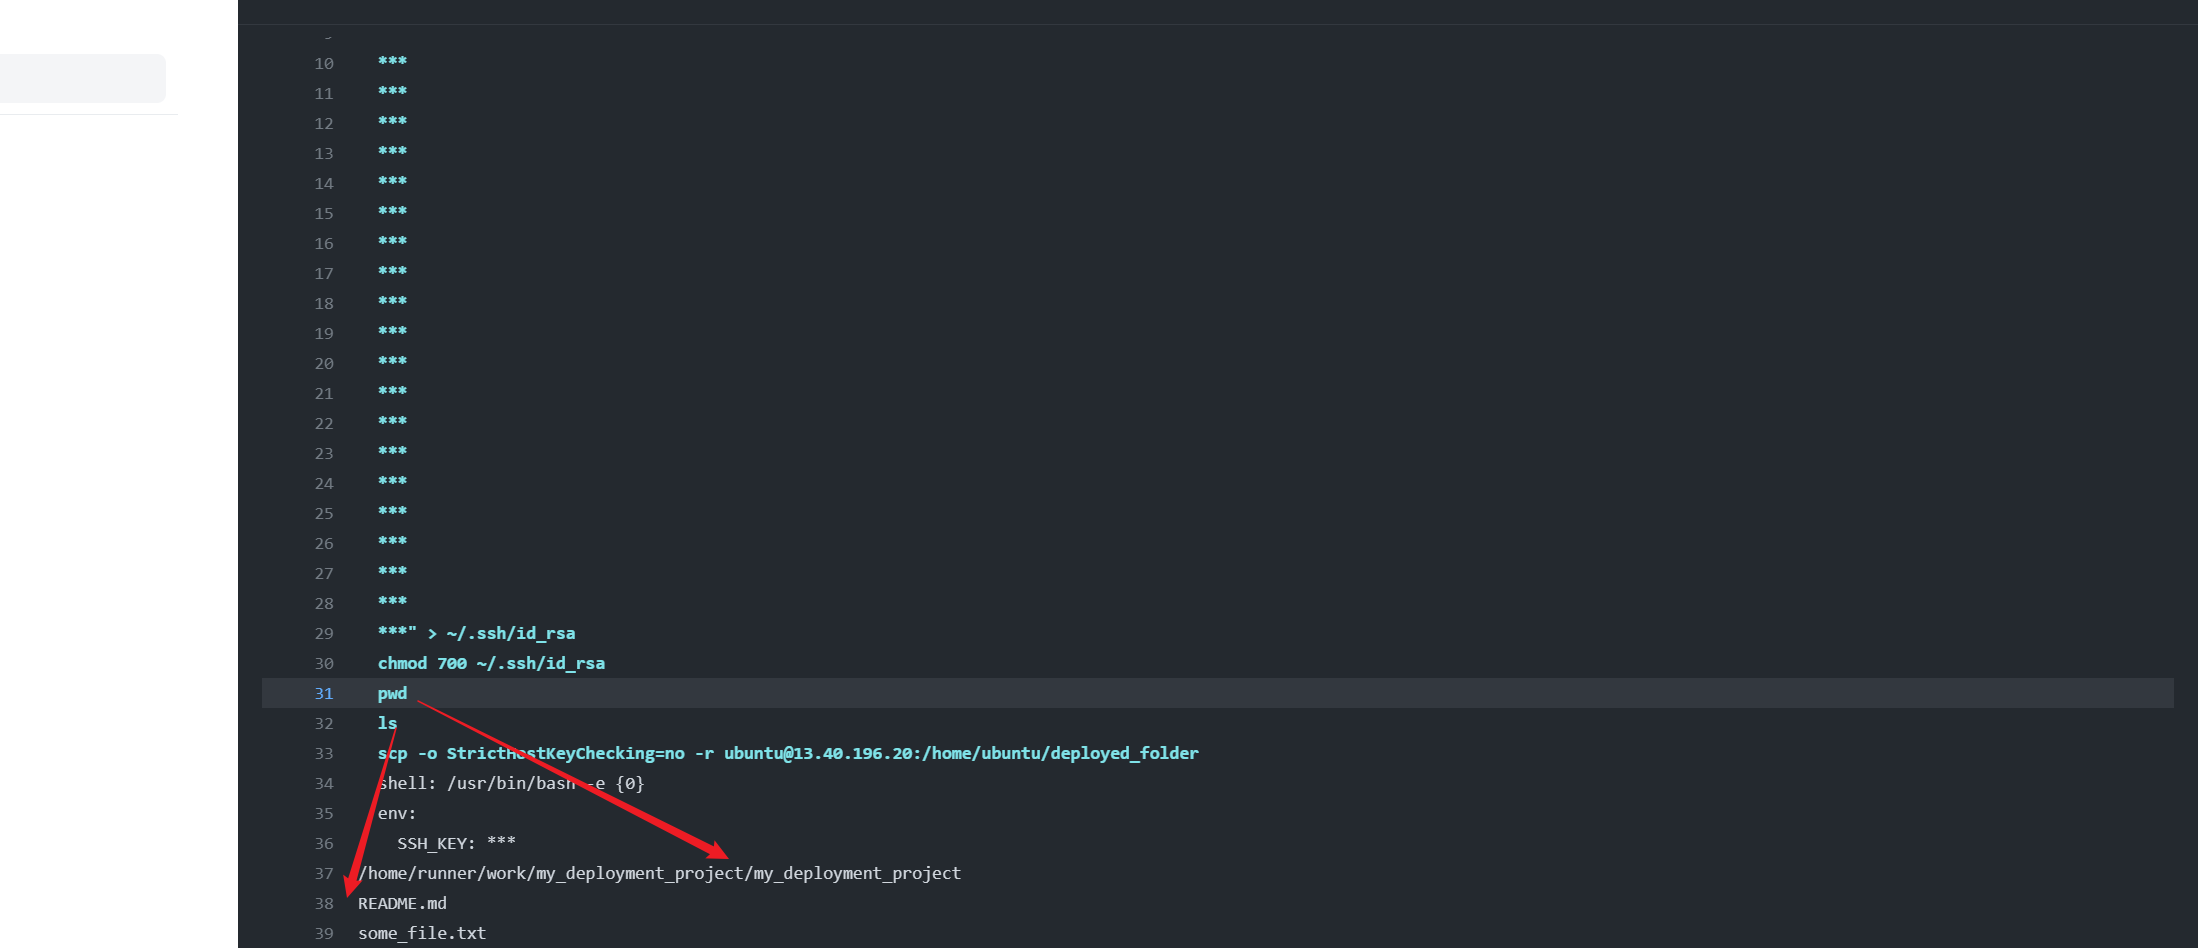
From this screenshot, we can see that the current working directory of the runner is already the repo itself. But we want to copy the entire repo, thus, we cd out a level, and use ./my_deployment_project as the source of copy in scp. By the way, details of each run of workflow can be found in the Actions tab in Github. Click on any of the workflows for more details.
1 | run: | |
scp, if you are not that familiar with it, stands for Secure CoPy, by using SSH. This command literally says “copy the current folder into this user@server:this_folder”. Dash o to disable an option that warns a message that comes out when it is the first time this computer trying to connect to this server by SSH, and dash r to recursively copy.
Now, if everything went successfully, you should see in your server-side:
1 | Server |
However, if you repeat this process various times, you find this error.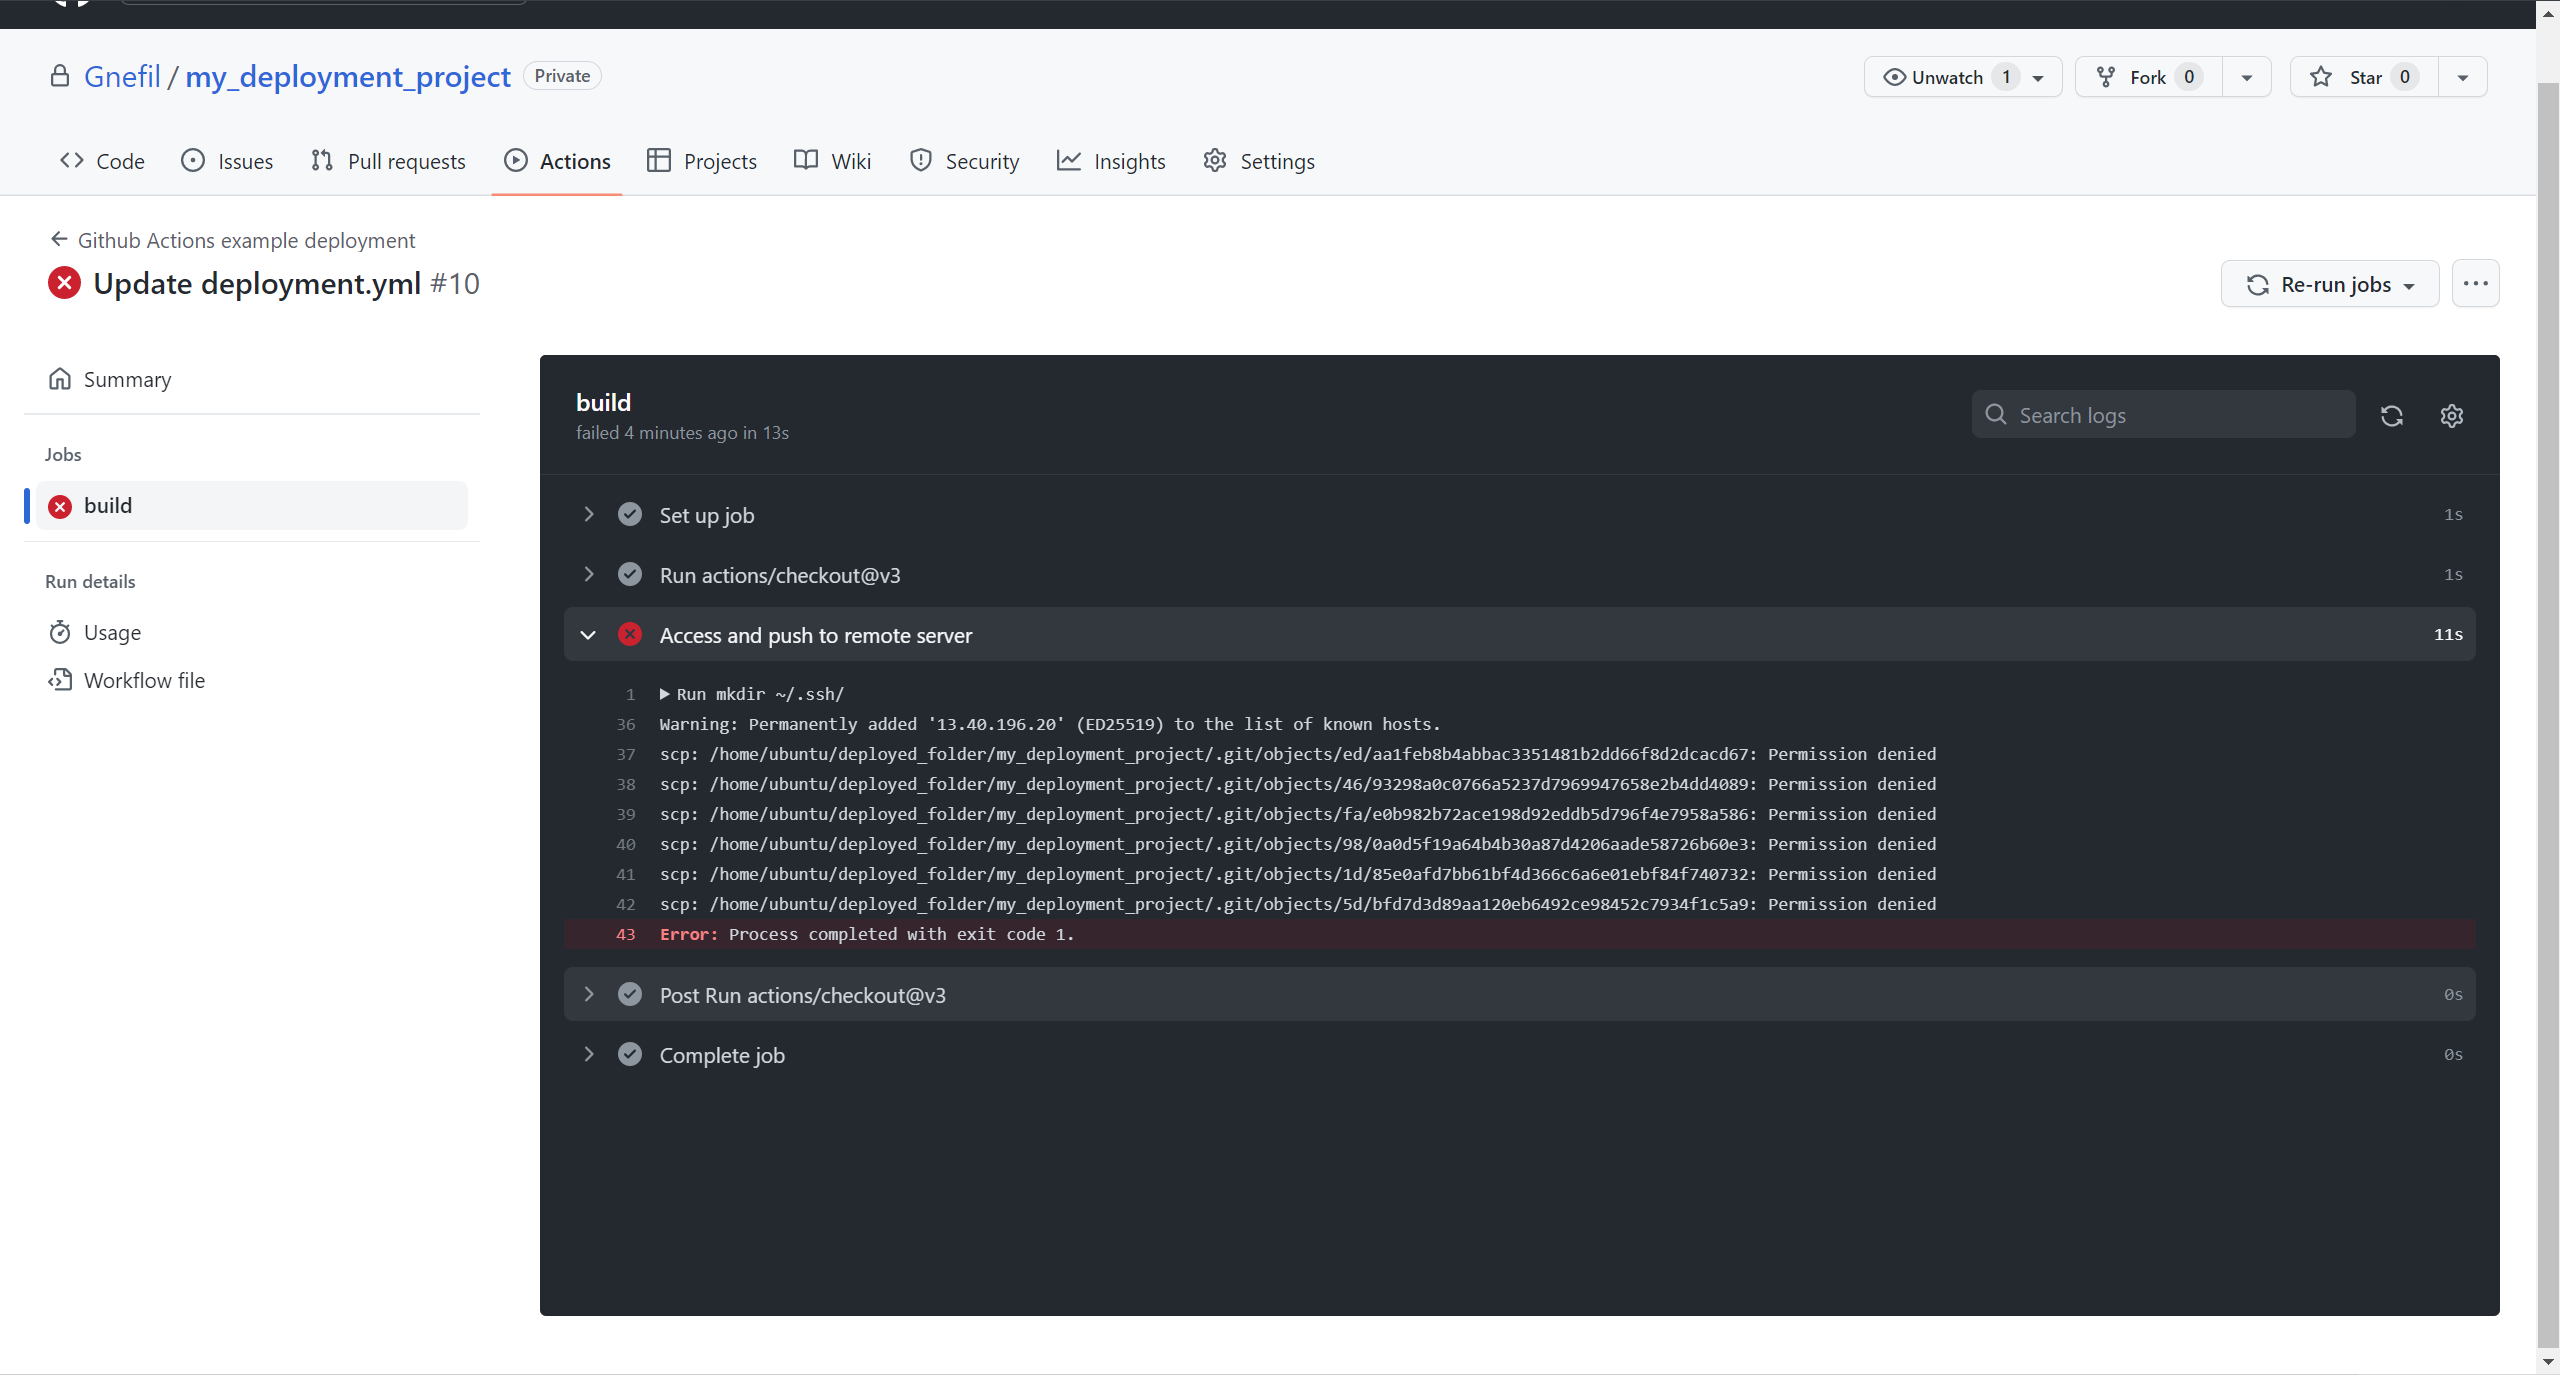
This is because the second time we are trying to scp in the same folder, we are essentially replacing the original ones. To avoid that, an easy workaround is to push the code first to the home directory temporally, move its content to the production folder, and then remove the temp folder.
1 | run: | |
At some moment, this would happen automatically in the server:
1 | Server |
Of course, this is not a correct solution to the replacement problem, as it won’t remove any old files that you have removed in the most recent pushes. Another “broken” solution (like this one) is to remove the whole production folder and add it again, in each deployment. However, this will derive an impaired web service for the duration of the deployment. More advanced and complete techniques would be to
rmthe differences between the two folders. Or to use two alternate folder locations, and while one is being deployed, run the other one in operation.
And… we are done! Now you have a simple workflow that automatically pushes your code to ~/deployed_folder whenever you make a git push to the main branch! This is the resulting code.
1 | name: GitHub Actions example deployment |
Personalise to your needs
This is only a very beginner and simple deployment script, which can be enhanced depending on your own needs. For example, the version I use for my blog is:
1 | name: Blog test and deploy |
In this script, I saved the installation, compilation and testing time by introducing npm (Node Package Manager) commands that I need to use to create the style of my blog. Before I used GitHub Actions, I would need to compile the whole project on my computer with hexo g (hexo is a Node-based blog framework), and push with hexo d to only push the public folder. And now that I use GitHub Actions, I can forget all about it and just push it. The workflow deals with the rest.